Request Catalog Administration
Before any jobs can be logged via the web portal (by either clients or staff), the Request Catalog system needs to be configured via the Desktop edition of HelpMaster.
Administration of Request Catalogs
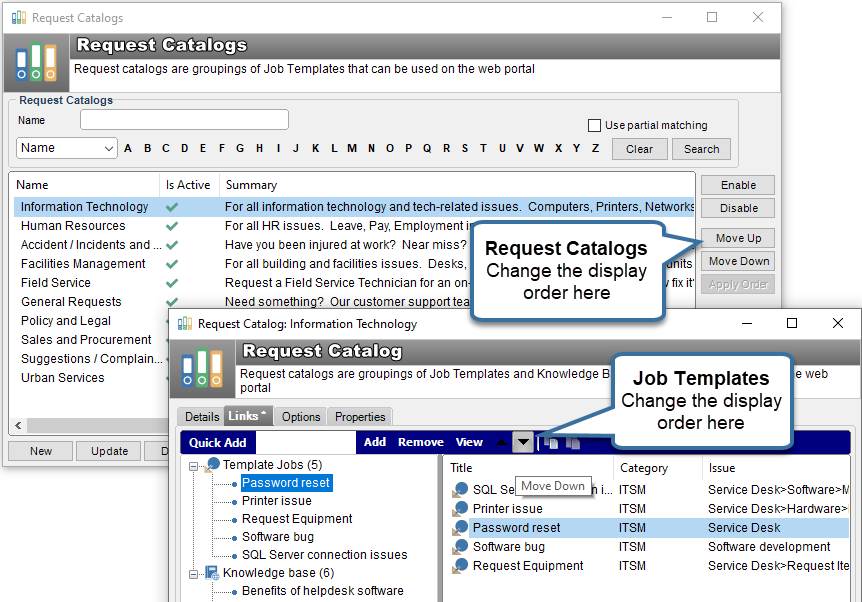
Request Catalogs are administered via the Desktop edition of HelpMaster via the “Web” menu > “Request Catalogs” toolbar button. Click “New’, or “Update”, or “Delete” to administer.
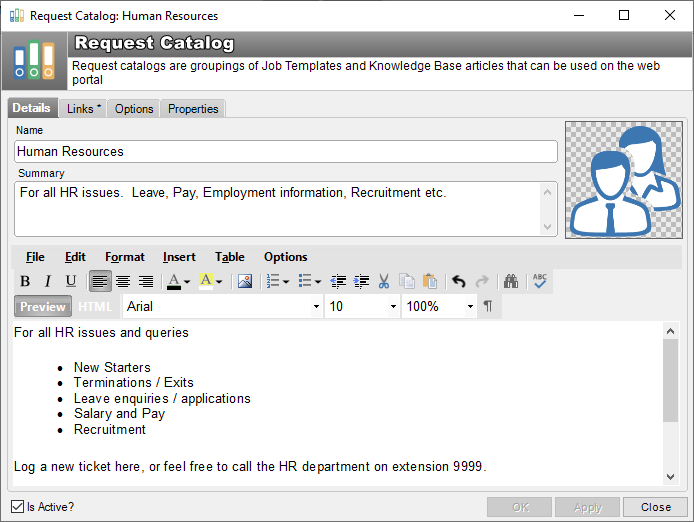
Details Tab
Name: Give the Request Catalog a descriptive name. This will be presented to the users via the web portal, so keep it short and meaningful
Summary: A brief summary of the why the user should browse/use this catalog. This will be presented to the users via the web portal and appear along with the Name.
Picture: Select a picture from file to be displayed for this request catalog. Note! Pictures are cached by the web portal. If the picture doesn’t appear immediately, use the Clear Cachelink on the web portal.
Details: A detailed description of the request catalog. This text can be used to describe the catalog, as well as present any additional information to the user once they select the catalog. The text here will be presented at HTML, so you can include hyperlinks, graphics and other web mark-up styles.
Links Tab
The links tab is used to link Job Templates and Knowledge Base articles to the Request Catalog. Use the “Quick Add” text box, or the Add, Remove buttons to adjust the links.
Use the order Up / Down buttons to order the items in the appropriate order.
Handy tip - Link the same job template to multiple catalogs
Create as many request catalogs as your business operations require. Remember that you can link the same job template to multiple request catalogs, which means that users can discover/find them easier if required.Options Tab
Use the options tab to control the visibility of a request catalog. By default, a new request catalog can be seen by everyone who can logon to the web portal.
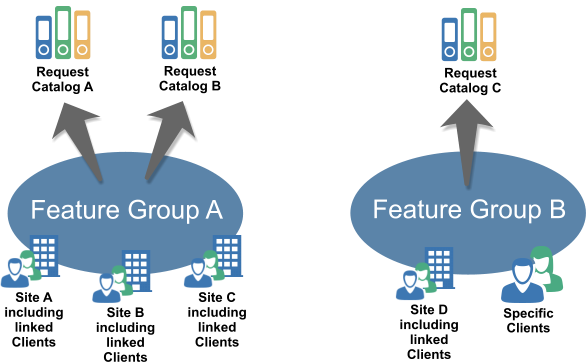
Visibility can be restricted by selecting which client and site “Feature Groups” can see the Request Catalog. See Grouping, Classifying and Controlling Access
Properties Tab
The properties tab displays miscellaneous information about the Request Catalog and provides a text box for configuration notes.
Use
Create a new Request Catalog by the following:
- Open the Request Catalogs screen by “Web” menu > “Request Catalogs” toolbar button
- Click New on the Request Catalogs screen to display a new Request Catalog
- Fill in the Name, Summary and Details to give appropriate descriptive content
- On the Links tab, link appropriate Job Templates and Knowledge Base articles by using the toolbar “Add” button, or by dragging and dropping
Web Enabling a Request Catalog
Check the Is Active checkbox at the bottom of the screen to display the Request Catalog via the web portal. Uncheck this box to take it off-line.
Best practice
Consider creating Request Catalogs for each distinct business unit, or business function as you need. Think outside of just IT. Consider Facilities Management, Human Resources, or Administration.
Control visibility of the request catalogs via Feature Groups for clients or sites.
See Also
Grouping, Classifying and Controlling Access
Feedback
Was this page helpful?
Glad to hear it! Please tell us how we can improve.
Sorry to hear that. Please tell us how we can improve.