Client Administration
All modifications to a client are logged and tracked via the System Event Log
Clients can be created, or updated by filling out the necessary information on the Client Details screen and then clicking on the Apply button. Access the Client Details screen via the Entities menu on the Ribbon.
Entities toolbar > Clients section > Clients icon 
Creating new clients
- Open the Clients screen via the navigation above
- Click on New. This will open the Client Details screen
- Enter the client’s name, or click on Full name to open the name details box
- Hit the tab key. This will automatically create the ClientID for you unless you entered the name via the name details box
- Enter the company name or use the selector button to select the name from the sites screen
- Enter all other details. Personal, Employment etc
- Apply any Links, Permissions or Custom requirements
- Click Apply
Settings Explanation
Time zone: Set this to match the timezone of the client at their location. This will allow HelpMaster to display the current time in their timezone to staff using HelpMaster. This information is also used if this client logs onto the Web Portal to present dates and times in their local zone.
Creating a new staff member
See Creating a new staff member for details about this.
Modify a Client
Modifying a client is to change their relevant details. A client may change their name, receive a change in their job title or change their phone numbers.
- Open the Clients screen
- Use the Search functions of the Clients screen to find the client you require
- Select the client required
- Click on the Update button. This will open the client details screen
- Enter the altered details
- Click on Apply
- Click on Close
Your changes have been entered and saved.
Merge a Client
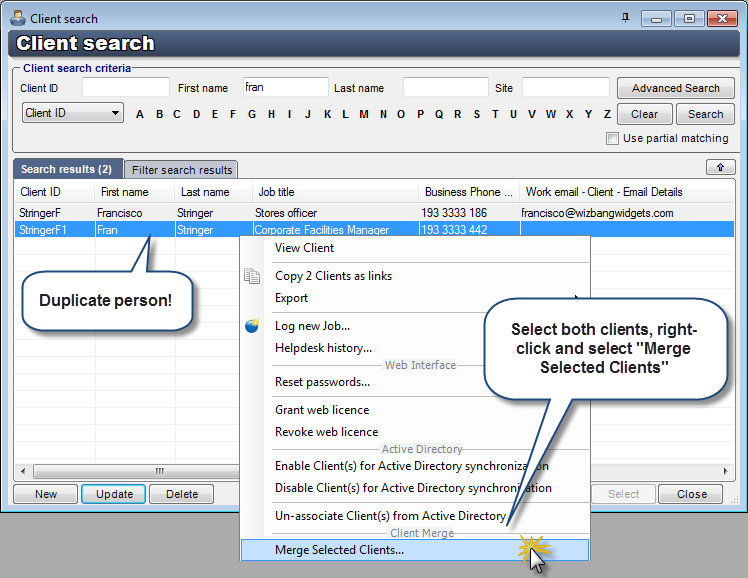
Duplicates happen!
Sometimes you may inadvertently create multiple versions of the same client, other times they may be automatically created by the Email Manager, the Active Directory synchronization, or via the API etc. When this occurs, you may wish to merge the clients together into just one. This is achieved via the client merge tool.
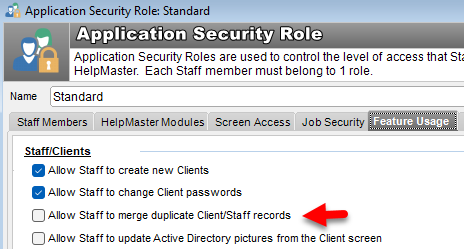
 Permissions checklist!
Merging clients/staff is a permission-based feature that must be granted to each staff member that requires this ability. See Application Security Roles
What happens to merged data?
When you merge 2 or more clients together into just one “master” client, all of the historical data is transferred from the duplicates into the master. This includes job history, any links (assets, sites etc) as well as any personal information and contact details. Quite often, the duplicate clients will have different data for each of the different data fields that HelpMaster supports (phone, email, web, etc). Where there is a conflict between the master client and the duplicates, the client merge tool will appear to assist you to resolve these differences and make your selection.
Once a client has been merged into the “master”, the duplicate client is completely and irrecoverably purged from the database.
To merge:
- From the client search screen, perform a search that will display the duplicate client names
- Select each of the clients
- Right click the “master” client (ie. the client that you want all the others to be merged into), and select “Merge selected clients” from the pop-up menu
- The Merge Client screen will appear
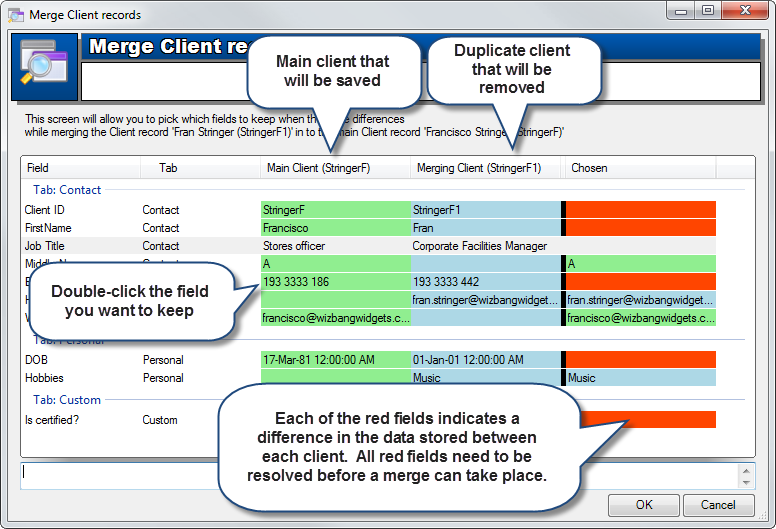
- The client merge screen will display all of the differences between each of the clients
- Double-click on the column / row of information that is the correct version
Deleting Clients
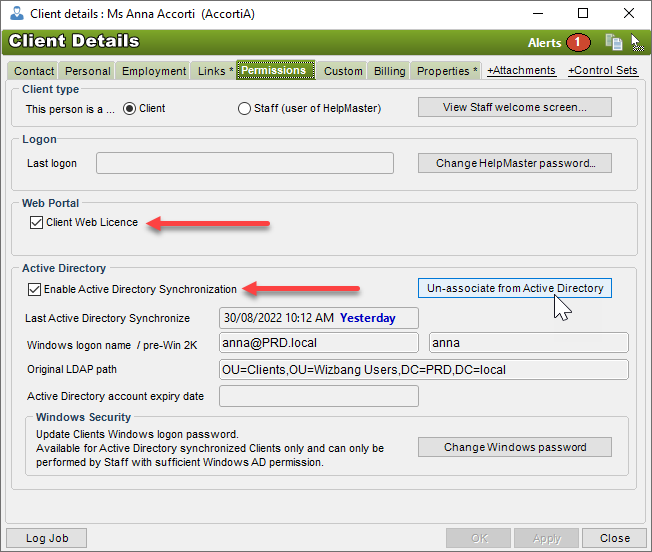
Clients that have job or other links will only be soft deleted (marked as deleted). Their ClientID is changed to Deleted«PKID» and their original ClientID will be stored in another field along with a deletion date/time stamp. Ensure that any client to be deleted has their Enable Active Directory Synchronisation option from the Permissions tab disabled and they have been Un-associated from Active Directory. Any client that is still Active Directory synchronized will be automatically undeleted by the Active Directory service if it is running.
Single client deletion
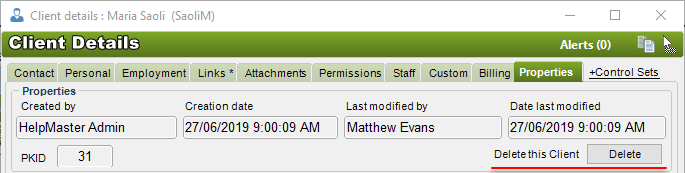
For single Client deletion this can be easily accomplished from the client’s Properties tab by just clicking the Delete button.
If the client is a staff member (ie. has a job queue within HelpMaster), you will first need to set them back to being a client, before you can delete them. See Removing a Staff Member
Multiple client deletion
- Open the Clients screen
- Use the Search functions of the Clients screen to find the client you require
- Select the client required
- Click Delete
- Click Yes in the confirmation box
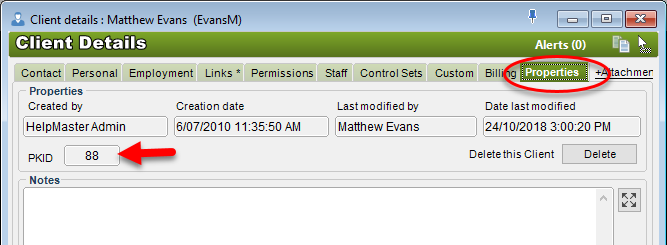
Determining the unique PKID of a client
Each client has a unique PKID number. This is a unique number that is used to identify this client in the database. This number may be used in SQL scripts for workflow, reporting, as well as the WebAPI for authentication purposes.
The PKID is displayed on the Properties tab of the client, similar to most other entities.
See also
Grouping, Classifying and Controlling Access
Linking other entities to a Client
Viewing job history for a Client
Automatically generating the Client ID
Feedback
Was this page helpful?
Glad to hear it! Please tell us how we can improve.
Sorry to hear that. Please tell us how we can improve.