Create new job
Logging a job can be performed in a number of ways, however there are some common principles that apply to a job, no matter how it is logged. These are :
- All mandatory fields must be filled in (For job summary and details mandatory field settings, see General System Settings)
- It must be Assigned to an active staff member, or closed
A keyboard shortcut to log a new job is by pressing the F6 key
Log a new job using the toolbar buttons
The log new job functionality is found on the “Jobs” menu, and the toolbars on the left. The diagram below explains what each button does.
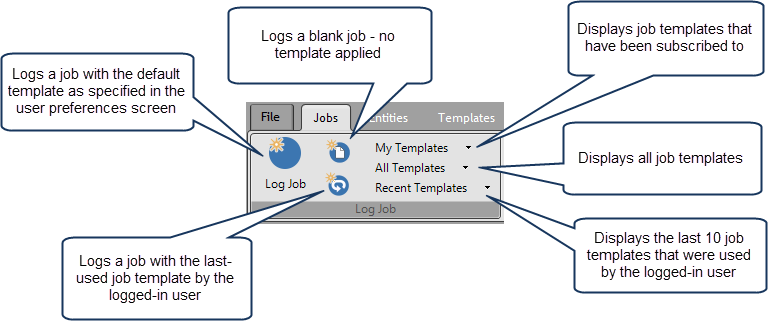
Hover over each button to display a tooltip that will indicate which job template (if any) will be applied when the new job screen is initially loaded.
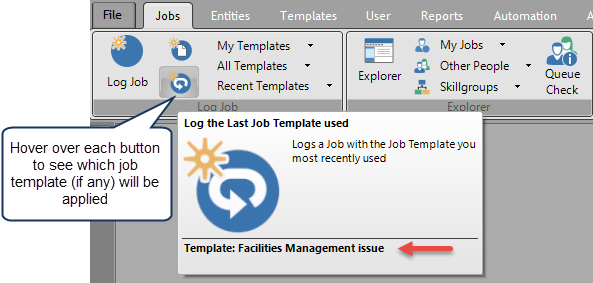
Once the new job icon has been clicked, the Job Details screen will be displayed, complete with template details filled in. This template can be over-ridden once the job screen is displayed by selecting a template from the drop-down box at the top of the screen.
Logging a job is a 2-stage process
Logging a new job involves the following 2 stages:
- Recording and classifying the details of the job
- Assigning it to the relevant staff/skillgroup
The v23+ desktop edition of the log job screen allows both stages to be completed on the same screen with the option to open the Action screen for step 2 if greater control is required (this is default behaviour for earlier versions).
The Log Job Screen
The screen shot below displays some of the fields and options that are available when logging a new job.
Once all of the mandatory fields have been filled in, click the OK/Apply buttons to log the job, or click the Log via Action Screen…. button to complete the process via the Action screen. Use this option for more control of assignment, time and billing and notifications etc.
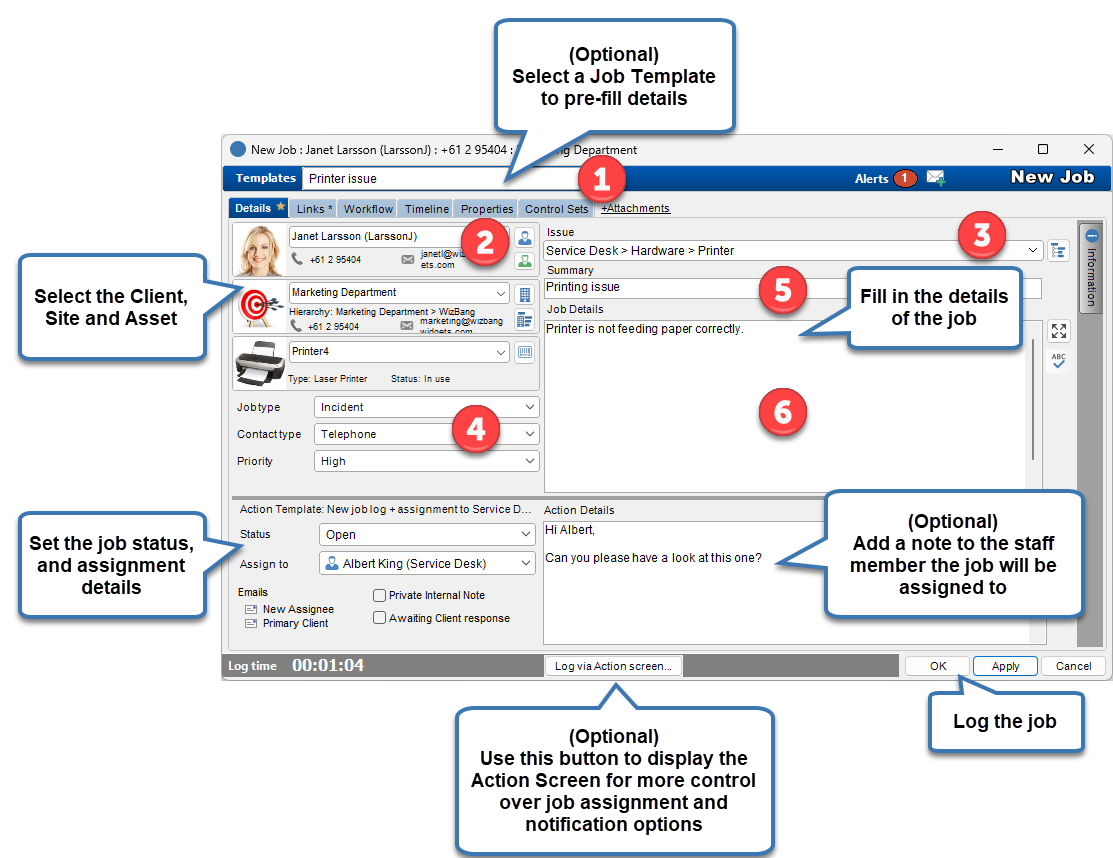
The Job Screen
- The Job template drop-down box. Select a pre-made job, or simply fill in the blank job screen, or both
- Primary client. Each job must have at least 1 client associated with it. Start typing either a client name, or site name, or any of their details (phone, email etc) and make a selection. You can also click the green client button to link yourself to the job. See Also Linking a site to a job as an alternative
- Classify the job via the classification viewer. Start typing, or select from the Classification viewer screen
- Classify the job with values for Job Type, Contact Type, Priority
- Job summary. A brief summary of the job. Use Auto text to speed up data entry
- Job Details. The full details of the job. Use Auto text to speed up data entry
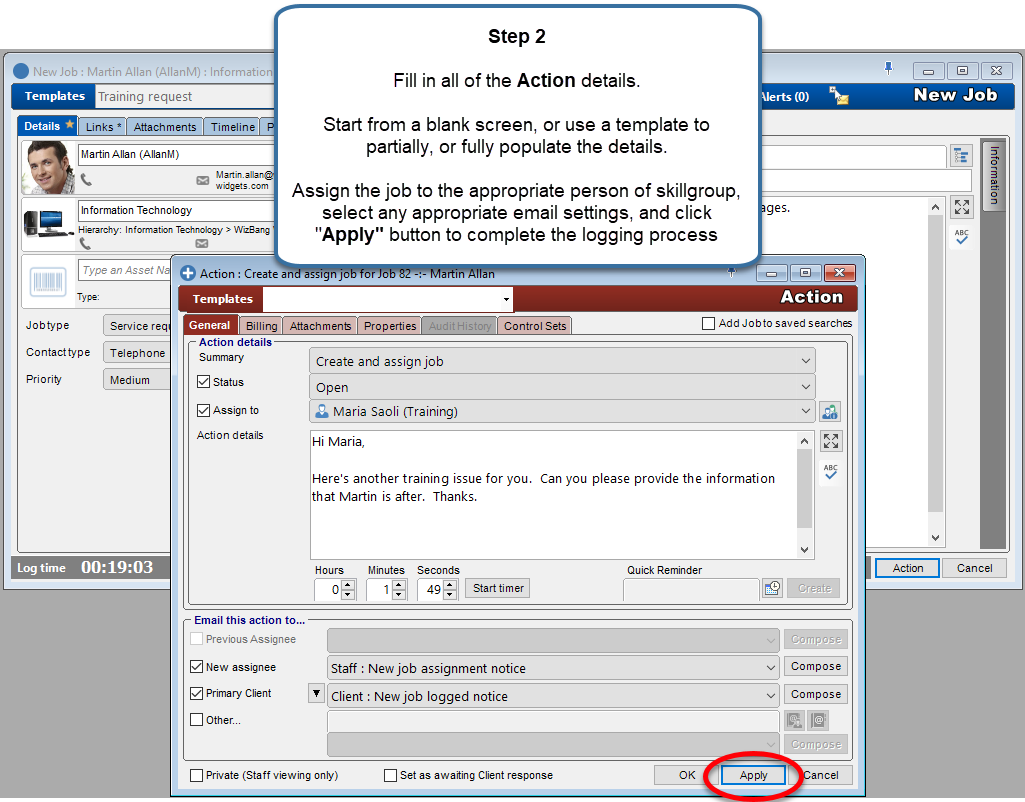
The Action Screen
- The Action template drop-down box. Select a pre-made Action template, or simply fill in the blank action screen
- Every action must have an Action summary code. This identifies what type of action this is
- Select a Job Status
- Assign the job to either a person, or a skillgroup. When assigning to a skillgroup, you can also use an assignment algorithm. See Assigning jobs for further information about this
- Time taken. This timer may automatically start. Use the controls to set the amount of time you spent on this action
- Quick Reminder. Set a reminder for this job/action. This will appear as a regular reminder that is linked to the job
- Specify who should get email, and what type of email content they receive. Use Email Templates, or compose your own
- Privacy option. Check this to ensure that this action is not published to the Web Portal, or to reports
Clicking Apply will create the job, and send 2 emails.
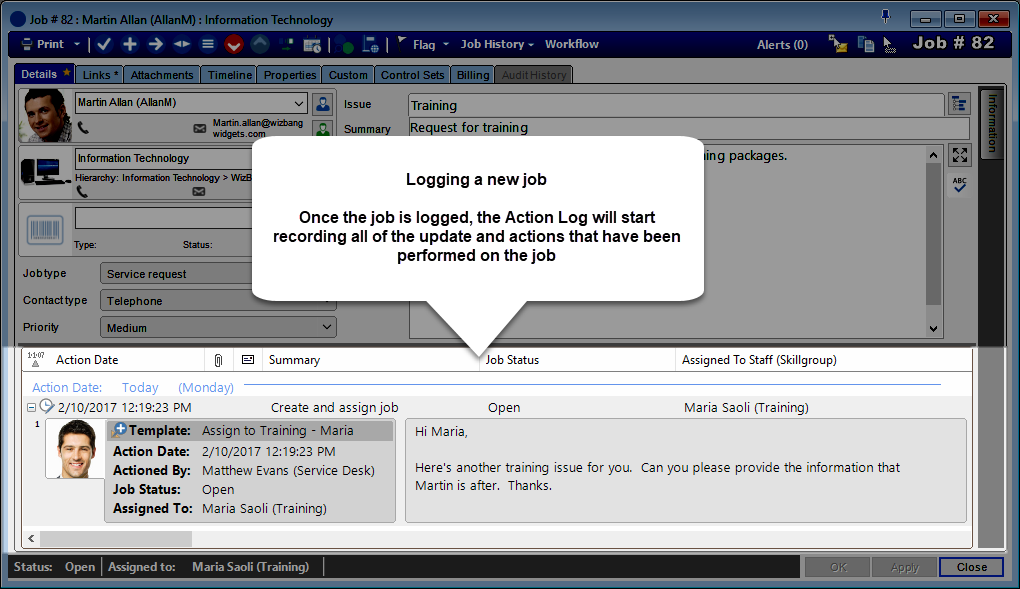
The Action Log
The Action screen will now close and the Action Log of the job screen will be updated
Once a job has been logged, it will appear in the staff / skillgroup queue of the Explorer screen
See also
Logging a job via drag ’n drop email from Outlook
Use Auto text to speed data entry.
System Codes (For administration of Job Type, Contact Type, Priority etc)
Feedback
Was this page helpful?
Glad to hear it! Please tell us how we can improve.
Sorry to hear that. Please tell us how we can improve.