Running and Stopping the Automation Service
Starting the Automation Service
Once all of the HelpMaster configuration settings have been completed, you will need to go to the Windows Services MMC to actually set the “Log on” account credentials that you previously tested. The Windows
Services MMC can be accessed by clicking the “Open ‘Windows Services Viewer’” button on the HelpMaster Service Setup screen or from Windows  Administrative Tools > Services menu option.
In order to start the Automation Service, do the following.
-
Configure all of the settings required for the Automation service as per Automation service configuration.
-
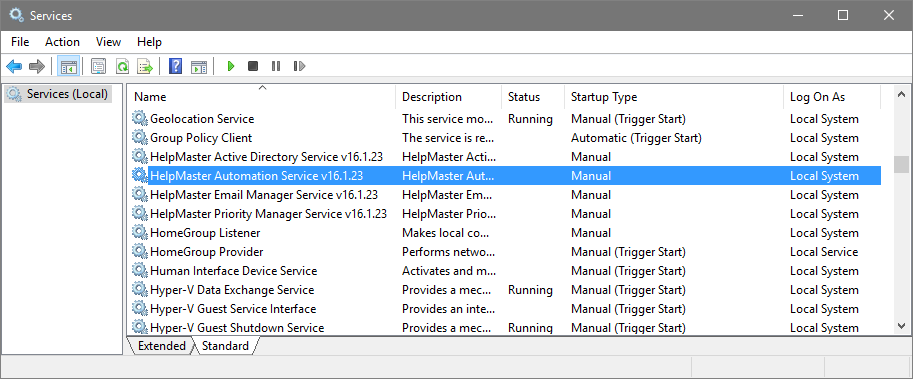
Click the “Open ‘Windows Services Viewer’” and scroll down to where all of the HelpMaster services are listed.
-
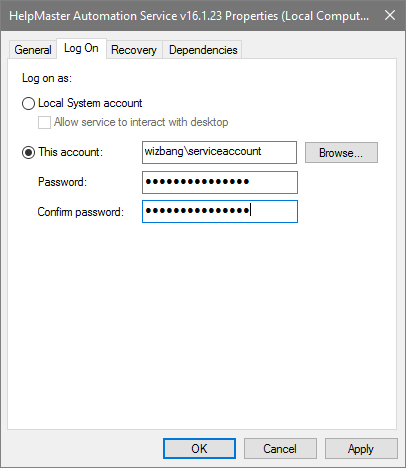
Double click on the HelpMaster service that you wish to start. On the “General” tab select the “Startup type:” Automatic (Delayed Start). On the “Log On” tab enter the credentials of your service account that you previously tested. After setting any further desired options, click “Apply” or “OK” to save the changes.
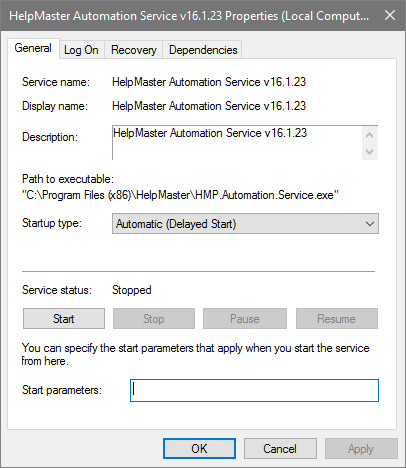
- If all of the settings have been configured correctly, the Automation service should start successfully using the Services toolbar start icon or the “Start” button on the services “General” tab..
Note : As soon as the Automation Service starts successfully, it will begin working with your HelpMaster database and any Triggered Event profiles that are marked as enabled. To disable profiles, refer to Managing Triggered Events Profiles
Stopping the Automation Service
Stopping or pausing the service is similar to starting it. Click the stop icon on the Services toolbar or the “Stop” button from the the Automation service's General tab..
Feedback
Was this page helpful?
Glad to hear it! Please tell us how we can improve.
Sorry to hear that. Please tell us how we can improve.