Saved searches
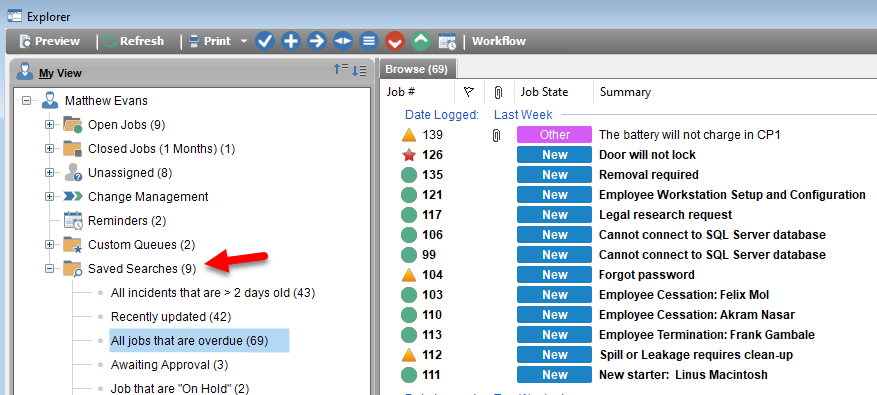
Saved searches provide a flexible way of extending the browsing capabilities of the Explorer screen by allowing you to create “virtual” job queues. By default, the Explorer provides built-in “searches” for both open and Closed jobs that are assigned to you, or have been closed by you. A saved search allows you to choose what type of jobs you are interested in and then provide a virtual queue to view them. There is no limit to the number of saved searches that you can create.
Saved searches are a great way to organize your job queue into separate “virtual” queues that you can work from. They can also be used as the filter for job reporting.
Creating a new Saved Search
- Open the Explorer
- Right-click on the “Saved Searches” item in the “My Jobs” Explorer Panel and select “Create Saved Search”
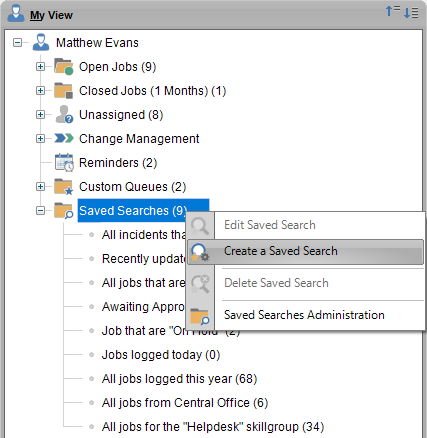
- The job finder screen will be displayed.
- Type the name of your saved search
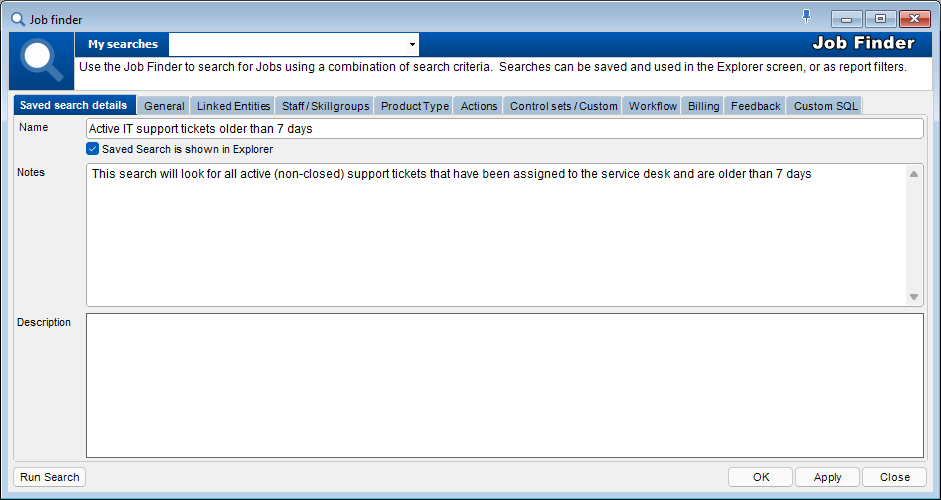
- Now use the rest of the tabs on the job finder to select the search criteria for the jobs that you want to create a saved search for.
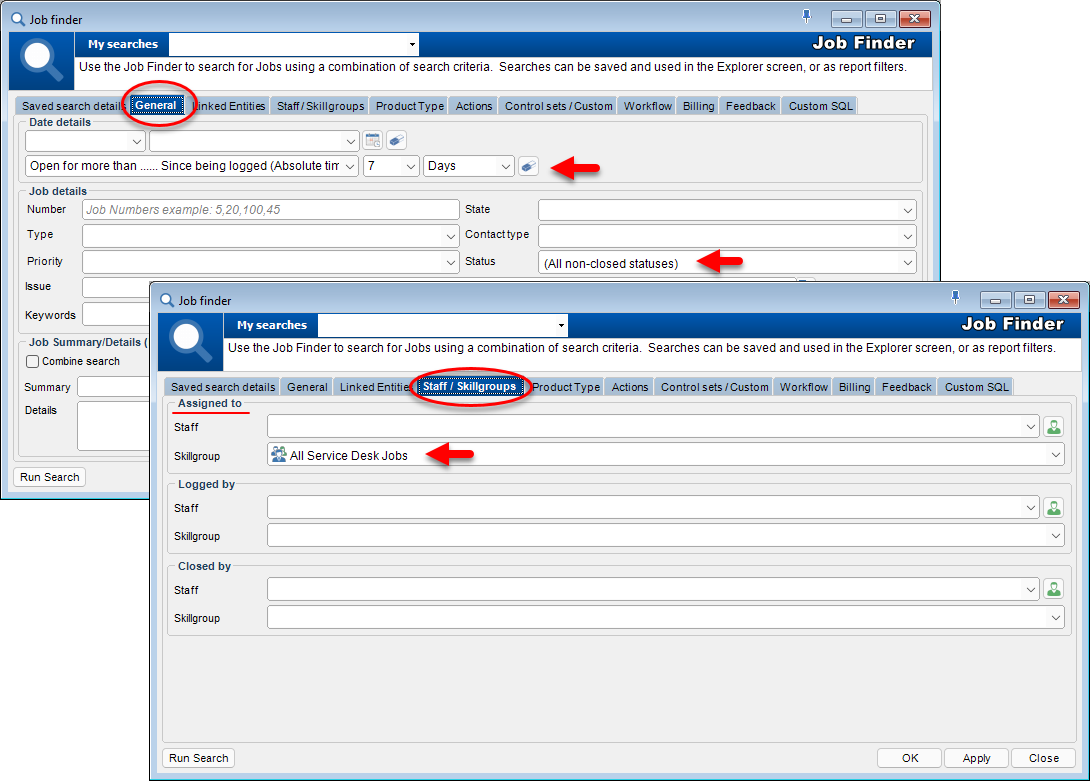
- Click “OK” to display a list of all the jobs in the system that match your criteria. You will also be presented with a dialog box to name the search.
- The newly created saved search will now appear in your Explorer
Example Saved Searches
Popular saved searches include the following:
Date-based
- Jobs logged Today
- Jobs logged Yesterday
- Jobs logged this week
- Jobs closed (Today…yesterday….this week/year etc)
- Jobs that have not been actioned for a period of time
Personnel based
- Jobs logged for Clients XYZ
- Jobs logged for Sites XYZ
Job based
- Jobs with a certain priority
- Jobs with a certain job type
See also
Report filters (use Saved Searches to do this)
Feedback
Was this page helpful?
Glad to hear it! Please tell us how we can improve.
Sorry to hear that. Please tell us how we can improve.