Defining a profile - Defining the actions
The actions to perform are a set of instructions to be followed once the criteria in step 2 has returned a result. The real power of the Priority Manager starts here. Use the “Actions to perform” tab on the Priority Manger profile to define what should happen once jobs are “found” by the search criteria.
Remember that the actions specified here will be applied to every job that is returned from the search criteria specified in the Priority Definition.
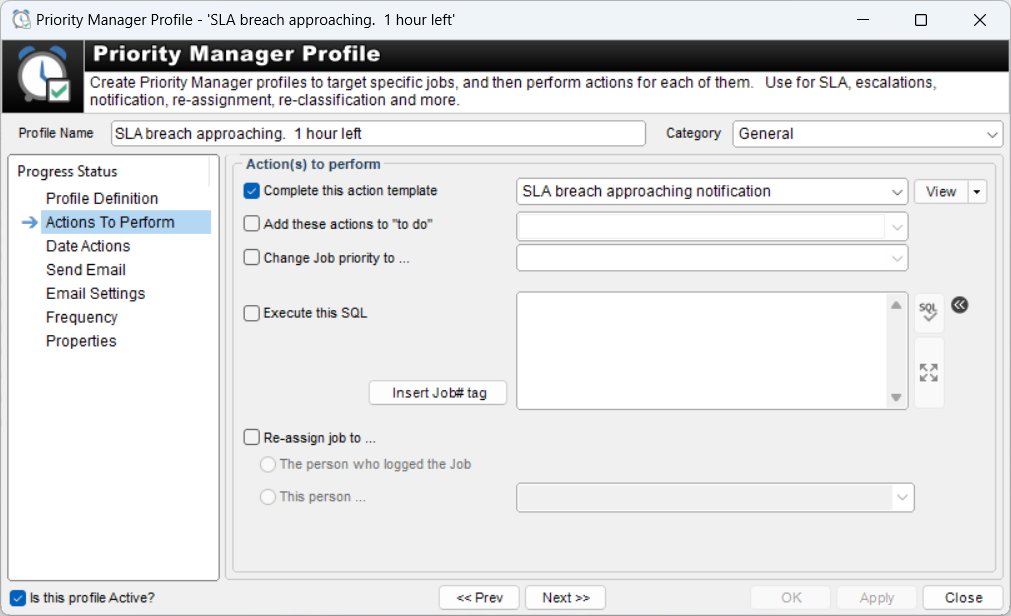
Check one or more of the action check boxes to perform the corresponding action for every job that the Priority Manager finds with the search criteria.
Complete this action template : The drop-down box is populated with all of the Template Actions that have been defined in HelpMaster. If selected, the Priority Manager will apply the selected action template to all of the jobs that are found in the search criteria. All aspects of the action template will be applied, including any email that the action template contains. Once the action template has been completed by the Priority Manager, an action log entry will appear in the job.
This option is a good choice if you wish to re-assign a job, send and email, change the job status etc. It’s just like adding an action to a job.
Add these action to “to do” : The drop-down box is populated with all of the Template Actions that have been defined in HelpMaster. Selecting one or more template actions here will add them to the “Actions To Do” list within the job. This may be a useful action to perform to enforce specific workflow practices on jobs.
Change Job priority to … : The drop-down box is populated with all of the available helpdesk job priority codes. Selecting one of these will change the job priority to this code.
Execute this SQL : This is a very powerful feature of the Priority Manager, however use with caution. It is recommended that only experienced database administrators familiar with the HelpMaster database schema use this option. Priority Manager will execute whatever SQL is specified here against every job that the criteria in step 2 produces. If the tag “«Job#»” is used within the SQL statement, the Priority Manager will substitute this with the current job number that it is working with. This allows great flexibility to create custom actions and database modifications.
Example. Use this SQL to update the “To be completed by” date that is found on the “Options” tab of a job.
Update tblHelpdeskJobs Set ToBeCompletedBy = 01/04/2025 Where
tblHelpdeskJobs.PKID = <<Job#>>
Use the “Check SQL” button to validate the syntax of any custom SQL that you enter in the text box.
Re-assign job to… : Choose from the options available to re-assign the job to a staff member. Note that re-assigning a job can also be performed by using the “Complete this action template” option - see above.
Next step> Date actions
See also
Triggered Events (an alterative to using the Priority Manager to do things)
System Administration
Security Setting to enable/disable SQL
Feedback
Was this page helpful?
Glad to hear it! Please tell us how we can improve.
Sorry to hear that. Please tell us how we can improve.