Drag and drop email - Create/Update Job
Microsoft Outlook users have a quick and convenient way to log a new job from an existing Outlook email, or to update an existing job from an email.
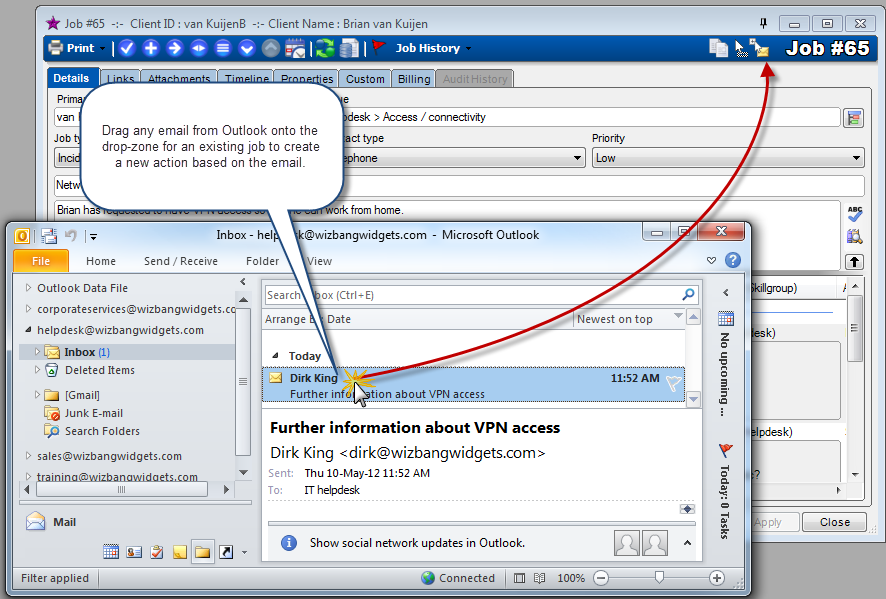
Simply drag an email from anywhere in Outlook onto the job drop-zone in the top-right corner of the job screen to import the email into HelpMaster for processing. The original email is not moved or affected in any way - you will need to decide what to do with it once it has been imported into HelpMaster.
From v25.10+ this will also work with the “New” Outlook option (Chromium Outlook) and online Outlook if using a Chromium based browser. For this to function, the integration of Microsoft 365 Azure will need to be configured first.
Logging a new job
If you drag and email onto a new job (you’ve already initiated logging a new job), then the email will be imported into the new job screen.
Updating an existing job
If you drag and drop an email onto an existing job, HelpMaster will assume that you want to update the job with the details of this email, and a new Action screen will appear. The details of the email will appear in the Action screen.
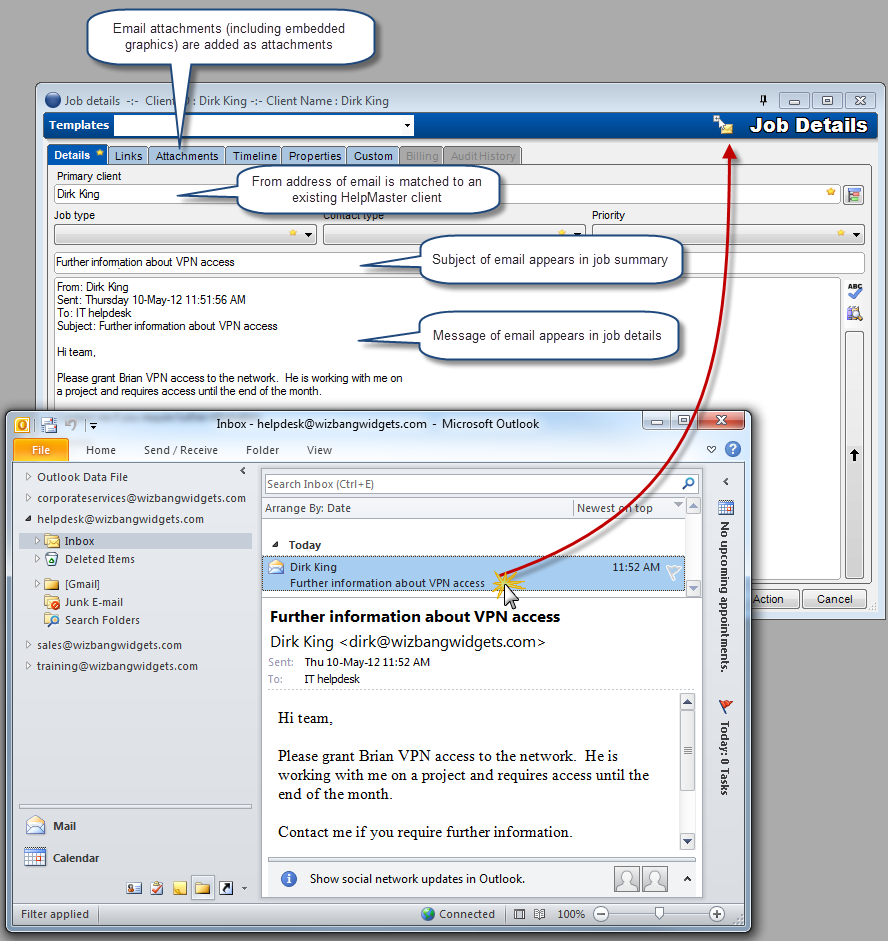
All of the contents of the email will be recorded in the new Action. Any attachments (including embedded screen-shots) will also be imported and appear in the “Attachments” tab of the action. If the “From” address of the email matches an existing client within HelpMaster, they will be selected in the “Actioned by” drop-down box on the Action Properties tab.
Attachments and graphics
Any graphics and attachments are automatically added to the Attachments tab.
Why isn’t the whole contents of the email being added?
By default, HelpMaster will truncate the email when it finds the first signature block, or personal sign-off text. HelpMaster uses a text-parsing algorithm to scan the email, and when it finds what it believes to be a signature block, it truncates the rest of the email. This feature is intended to reduce the amount of text you add to a job, by only referring to the most relevant and recent email reply.
To bypass this feature, hold down the <Ctrl> key when dragging and dropping the email. This will direct HelpMaster to include the entire email.
See also
Automatically convert email into jobs using the EmailManager
Microsoft 365 Azure Integration
Feedback
Was this page helpful?
Glad to hear it! Please tell us how we can improve.
Sorry to hear that. Please tell us how we can improve.