Email Template Tags
Email Template Tags allow you to add dynamic content to email templates and other out-going email. Email tags represent actual information from jobs, clients, sites and assets can be inserted into an email template. When the email template is used to send email, all tags will be replaced with their corresponding data. This concept is similar to a mail merge in a word processor.
Use email tags to really contextualize your email and add vital information to all out-going email.
If using the web portal, ensure that you have set the URL for the web portal in the web settings screen. This is vital for the email template tags to function correctly.
Email Management workflow
Email tags play an important role in configuring and creating an Email Manager workflow. The Email Manager scans incoming email to search for the job number within the subject of the incoming email. This job number is then extracted and used to attach the email to the corresponding job. Email Tags are used for this situation.
Most of the email template tags are self-explanatory in that they simply represent the data in their corresponding entity. Other email tags have calculated, or special values.
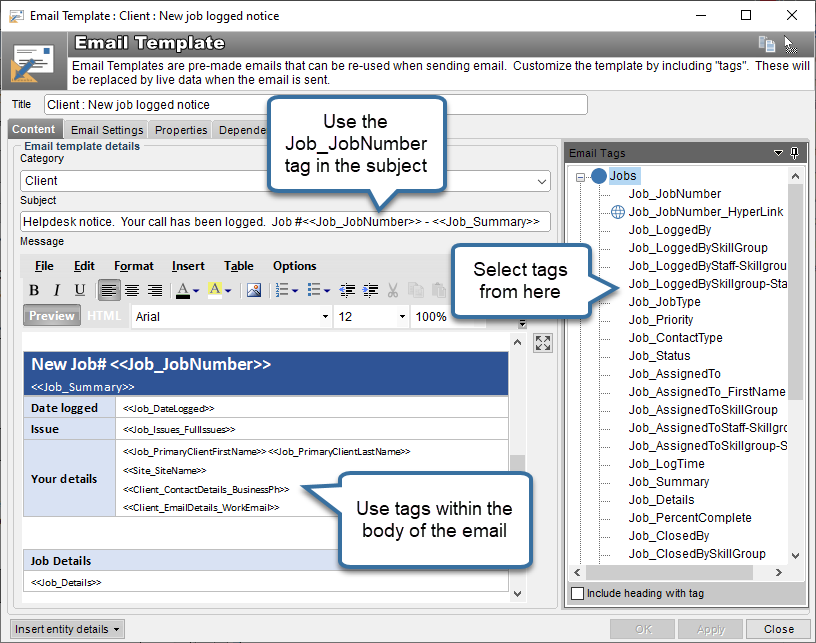
Using Email tags
Email tags are inserted into Email templates as placeholders. They appear in the email template as tags surrounded by double “«” or “»” signs. Once the email template is used, these tags are automatically replaced with the matching contextual information. Any tags that cannot be matched to contextual information are removed and will not appear in the outgoing email.
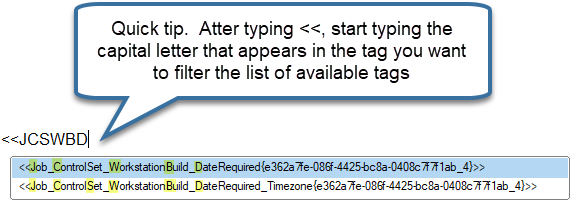
Control Set field tags
Control Set field tags look a little different from other tags. They are a combination of the friendly-name + a system generated GUID (Globally unique identifier). Both sections of the tag are required in order to be used.
Use intellisense to select control set email tags.
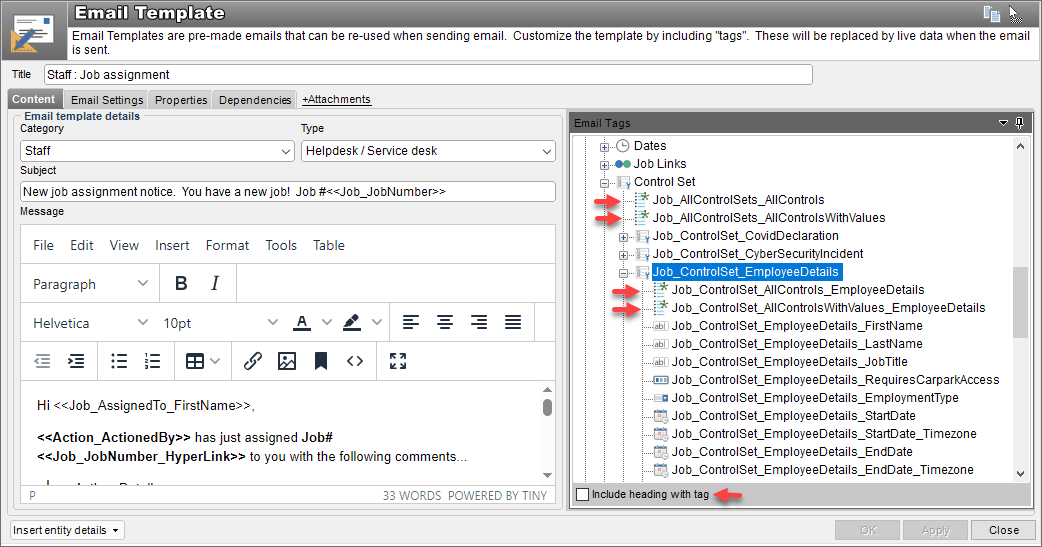
“All Control Set” email template tags
Along with individual control set field email tags, from HelpMaster v24.7 there are four new types of “All” job control set tags. There is also the option to display captions along with any control set email tags or not using the Include heading with tag checkbox option.
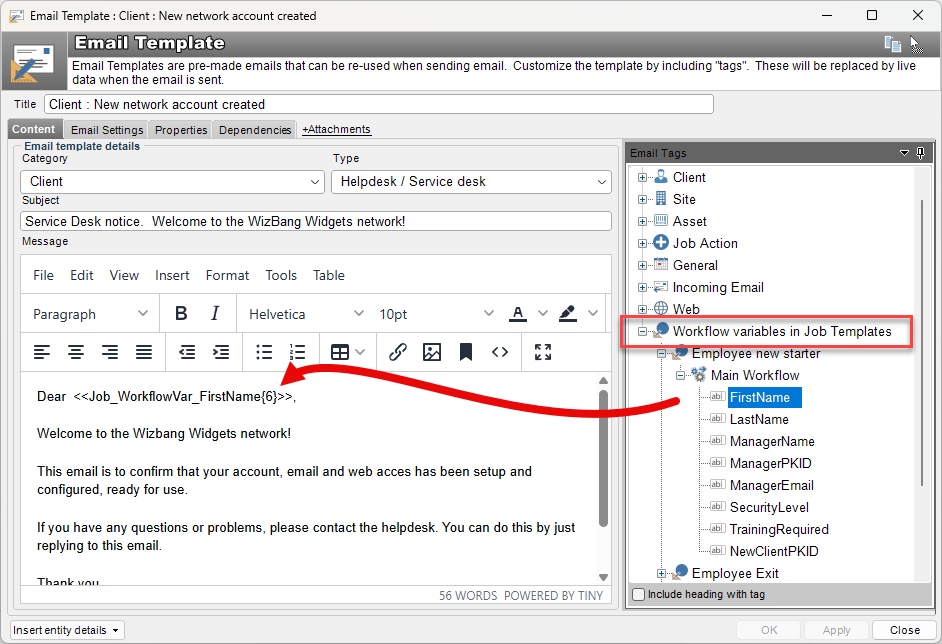
Workflow Variables
Email Templates can also use Workflow Variables that are part of Job Templates. This is especially useful if you are sending email via workflow, and the content of that email includes information that is either part of the job, a Control Set field on the job, or some other workflow variable that has been created.
To use this feature, create a Job Template that contains workflow. Any variables that created in that workflow will appear in the Email Template screen under the section “Workflow variables in Job Templates”.
Workflow variables can be assigned values from user input, scripts, Control Set field data and more.
The Client Professional Title email tag
This special tag is used to include a person’s professional title as part of their salutation, and drops their first name, or, if the person does not have a professional title, then the tag reverts back to either Firstname, or Firstname Lastname.
eg. If a person does have a professional title, using the tag would generate:
- Dr Jones
- Professor Brown
- Senator McCraken
If those same people do not have a professional title, the tag would generate:
- Robert Jones
- Emmet Brown
- Festus McCraken
Use
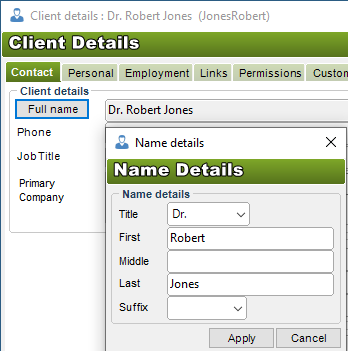
A client’s name is made up of 5 parts - A Title, First Name, Middle Name, Last Name and Suffix as shown below.
Client titles are administered via the Clients > Title node of the System Codes screen.
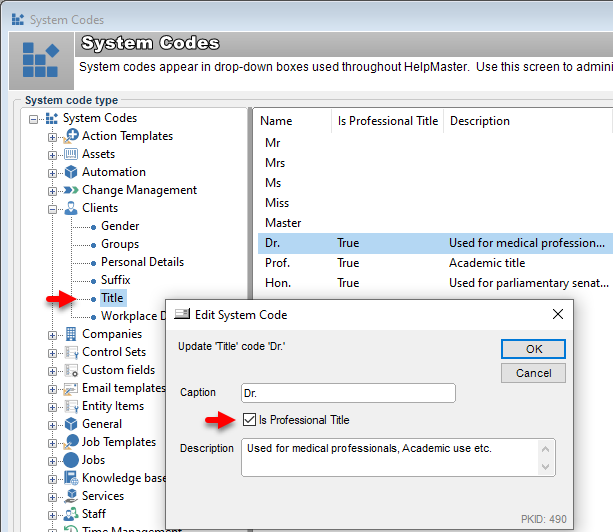
When titles are marked as “Is Professional Title”, the following two email template tags may be used to enhance email communication:
- «Client_ProfessionalTitle_or_Firstname»
- «Client_ProfessionalTitle_or_FirstnameLastName»
When used in an email, these tags will be replaced with the Title of the client followed by their surname (if Is Professional Title is checked), or just their Firstname/Lastname as appropriate if they do not have a professional title.
For example:
A client’s full name is: Dr Robert Jones
If the «Client_ProfessionalTitle_or_Firstname» is used in an email template, this will be replaced with Dr Jones.
For other clients that do not have a professional title as part of their name, this tag will resolve to: Robert
Attachment tags
Attachment tags are very useful if you work with file attachments for either jobs or actions. Consider using the following tag in all Email Templates that are used for your jobs.
«Job_Attachments_Links». This tag will insert a hyperlink into a HTML email for each attachments that is linked to a job. The hyperlink will point back to the original attachment location, which will be in the “Attachments working folder”. Good to use if dealing with large attachments, or you just want a clean and neat out-going email
«Job_Attachments_Attach». This tag will insert the actual attachment into the outgoing email. Each attachment that is linked to a job will be attached to the outgoing email
«Action_Attachments_Links». This tag will insert a hyperlink into a HTML email for each attachments that is linked to an action. The hyperlink will point back to the original attachment location, which will be in the “Attachments working folder”. Good to use if dealing with large attachments, or you just want a clean and neat out-going email
«Action_Attachments_Attach». This tag will insert the actual attachment into the outgoing email. Each attachment that is Linked to an action will be attached to the outgoing email Remember that the attachment tags will only attach the attachments if they are present in the corresponding job or action.
Incoming email tags
These tags are used when utilizing the Email Manager. They refer to the original email that was processed to create the job that is being used in the context of the email tag.
Web email template tags
If using the HelpMaster Web Portal, the following email tags may be helpful to direct people to your on-line instance of HelpMaster.
«HelpMaster_Web_URL_Homepage» : The login page for your HelpMaster Web Portal
«HelpMaster_Web_URL_KnowledgeBase» : The public-facing (no logon required) knowledge base page\
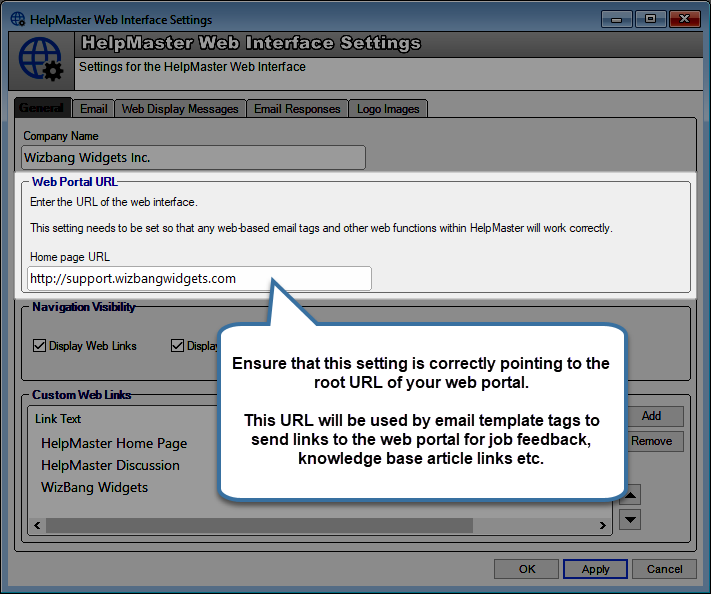
The values for each of these tags is specified in the Web Portal settings screen.
Job Feedback Survey tag
If you are utilizing the job feedback system, you will want to make use of the <<Job_Satisfaction_Survey>> tag. This will be replaced with a link to your job survey/feedback that you've created. Read more about the job feedback system
Consider using the job feedback tag to survey your client on every email interaction, not just when the job is closed.
Creating custom web hyperlinks from tags
Sometimes you may want to create a custom web hyperlink from information in the job. This may be useful if using a custom feedback system, or to integrate into other web pages and/or intranets where a custom link is required.
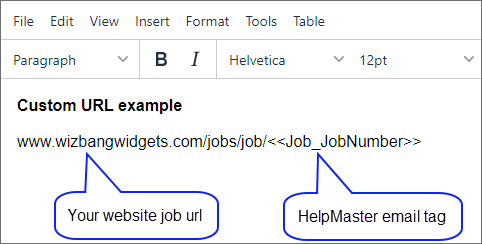
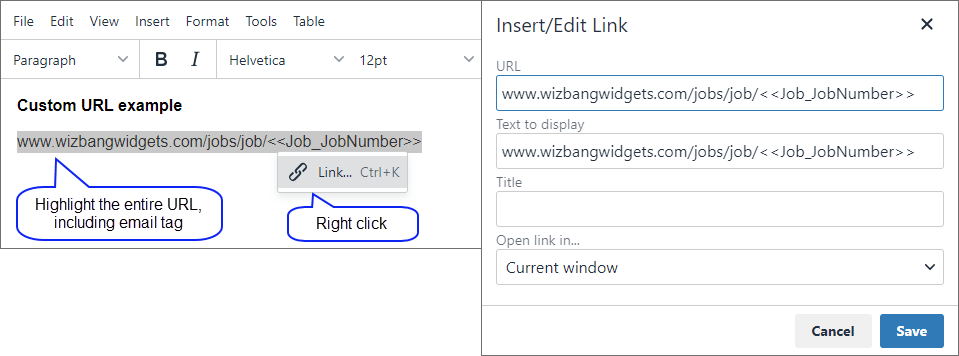
Construct custom hyperlinks by doing the following:
- In the email template, type the web URL of the website and append any relevant HelpMaster email tags to complete the URL
- Highlight the entire URL, including the email template tag, and use <Ctrl><C> to copy it
- Right click on the link, select Link…, and paste into the URL field using <Ctrl><V>
- Click Save and the hyperlink is created
Type your custom URL, and use any HelpMaster email tags that are relevant
Turn the text into a hyperlink by right clicking on it
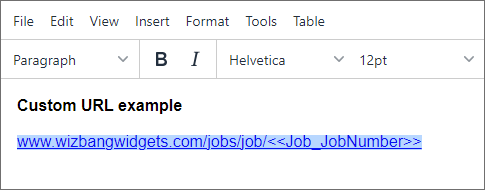
When the email is sent, the tag will be replaced and the URL will be valid
See also
Change Management Email Templates - For specific use with Request for Change emails
Sending an email via the action screen
Job Template - Web Entry Form - Control Set Tags
Feedback
Was this page helpful?
Glad to hear it! Please tell us how we can improve.
Sorry to hear that. Please tell us how we can improve.