Microsoft 365 Azure
In order to send and receive email (or create/modify calendar entries) via Microsoft 365, your Azure administrator will need to create a HelpMaster App registration in your Azure tenant and then grant it permission to send and receive email (or create/modify calendar entries) on behalf of users.
 Permissions checklist!
To complete this step, you will need:
- Azure administrative access (https://portal.azure.com) or (https://portal.azure.us) for US Government
- Microsoft 365 Admin center (https://admin.microsoft.com)
- Exchange online administrative access (https://admin.exchange.microsoft.com)
- Powershell knowledge and access to Exchange Online Powershell
- HelpMaster administrative access
Once the HelpMaster App Registration has been created and configured in your Azure tenant, you will need to copy the app configuration details from your Azure tenant and copy them into the HelpMaster System Administration > API Integrations > Microsoft 365 tab. This will allow HelpMaster to connect to the Azure HelpMaster app, and use its credentials to send and receive email.
Step 1 - Create and configure your Microsoft 365 HelpMaster App
- Log in to your Microsoft Azure Portal at portal.azure.com (Global), or portal.azure.us (for US Government) with an administrator account
- Navigate to Azure Active Directory > App Registrations
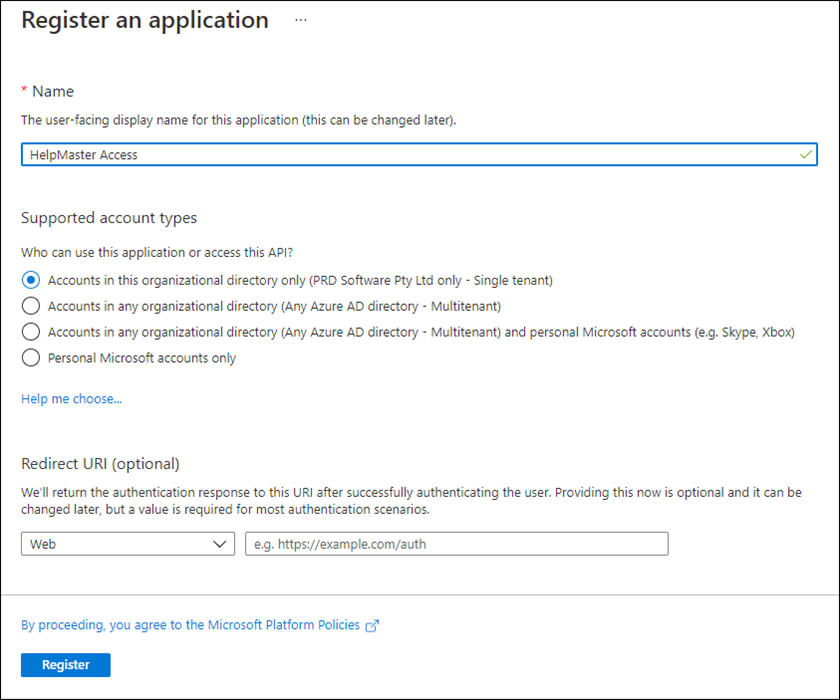
- Click New registration
- Enter a name. eg. HelpMaster
- Select the scope of the accounts that you would like to grant access to. To limit access only to your Azure tenant then select the first option, Accounts in this organizational directory only ([Your org] - Single tenant)
- Click Register to create the app registration
Step 2 - Granting Graph API permissions
Once the app has been created, you will need to configure what Graph API permissions it will have access to.
| HelpMaster module | Functionality | Permission Required | Permission Type |
|---|---|---|---|
| All modules | Browse / enumerate users in M365 | User.Read.All | Application |
| All modules | Send email from HelpMaster | Mail.Send | Application |
| Email Manager | Read email inboxes / folders | Mail.ReadWrite | Application |
| All Workflow Scripts | Manage Calendar Schedules | Calendars.ReadWrite | Application |
| Active Directory v24.7+ | Entra ID Synchronisation | Group.Read.All | Application |
| Active Directory v24.7+ | Entra ID Synchronisation | TeamMember.Read.All | Application |
Send Only Permissions
The minimum permissions required to be able to send emails from HelpMaster, are User.Read.All so as to be able to find the required user or shared mailbox along with its basic details, and Mail.Send to be able to send email from any mailbox.
Read, Write & Move Permissions
For Email Manager to be able to utilize M365 mailboxes, you will also need to grant Mail.ReadWrite permissions in addition to the above send permissions.
Calendar Scheduling Permissions
Microsoft 365 calendar scheduling is also possible via a Workflow Powershell script. This will require the Calendars.ReadWrite permission. Contact PRD Support for further information.
Entra ID Synchronisation
In HelpMaster v24.7+, Microsoft Entra ID synchronisation is also possible via the HelpMaster Active Directory module. To utilise this feature you will also require Group.Read.All and TeamMember.Read.All application permissions.
Granting permissions
-
Click View API Permissions (if you’re still on the initial screen, or API Permissions from the left-side menu)
-
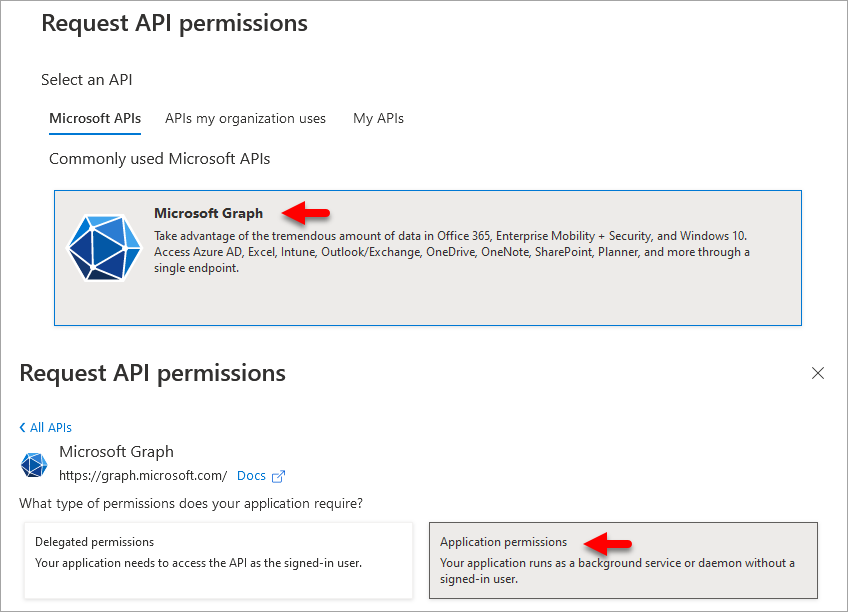
Click Add a permission
-
From the Request API permissions panel, click the top panel Microsoft Graph and then Application permissions
-
Scroll down to the Mail section and expand it
-
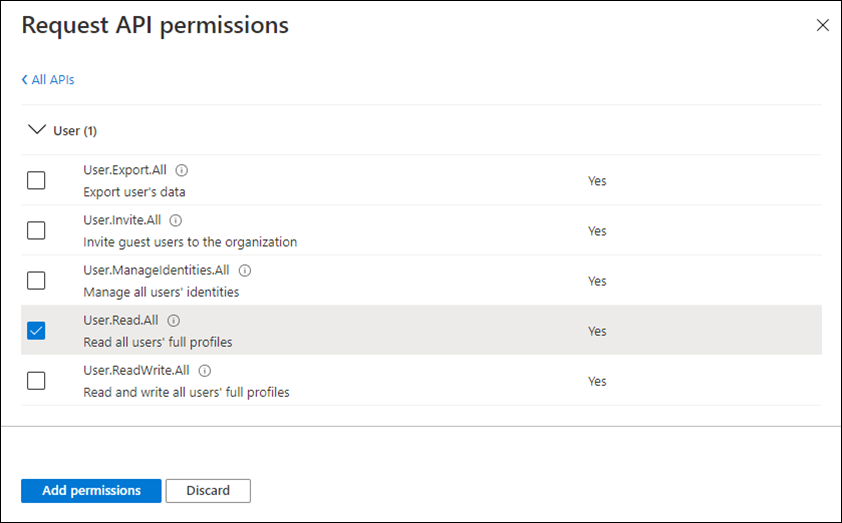
Select (tick) all of the required permissions as per the table above
-
Scroll down to the User section and select the User.Read.All permission to allow reading of user profile information. This permission is required for being able to select the account you want to use via the HelpMaster interface when configuring the mail account later
-
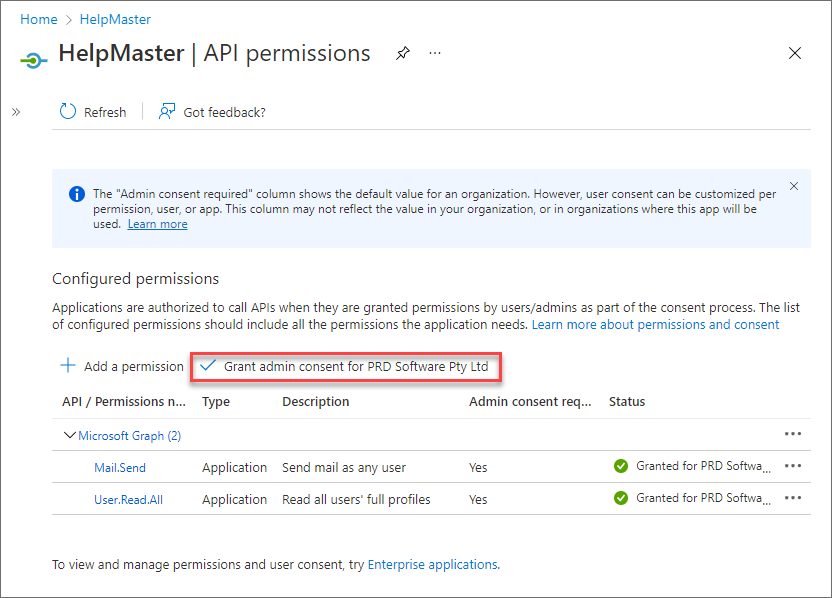
Click Add permissions. Once the API permissions have been granted to the HelpMaster app, you need to grant consent to use the app within your Azure tenant
-
Click Grant admin consent for [Your Organization] link and click Yes to the confirmation prompt
Step 3 - Create a Client Secret
In order to be able to use the app within HelpMaster, you need to configure a Client Secret for the app.
- Click Certificates & secrets from the left-side menu
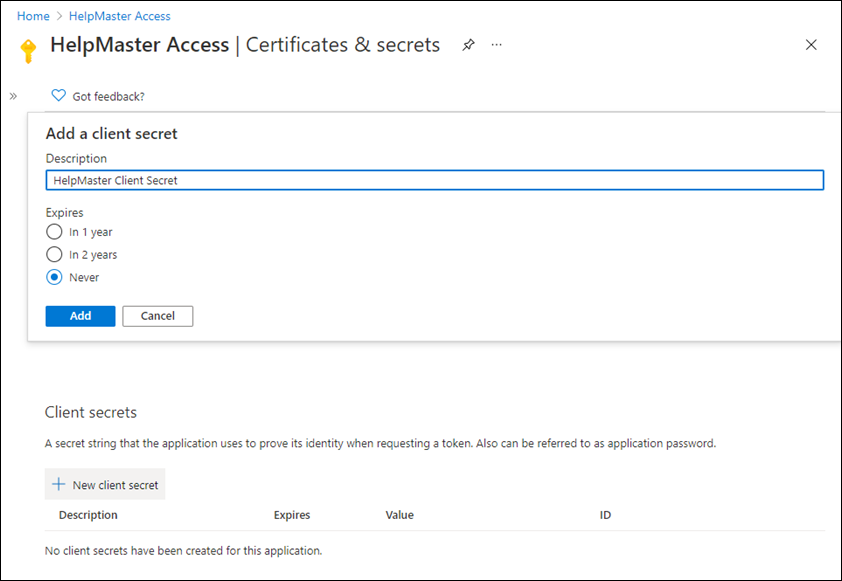
- Click New client secret
- A dialog box will appear prompting for a Description of the secret. This is a descriptive label only - it isn’t the secret. Enter the descriptive name and set the expiry to your preference. Note that if a secret expires, any code/apps/APIs using this app (Including HelpMaster) will stop working, and you’ll need to create a new secret and re-enter this value into the configuration within HelpMaster. Click Add
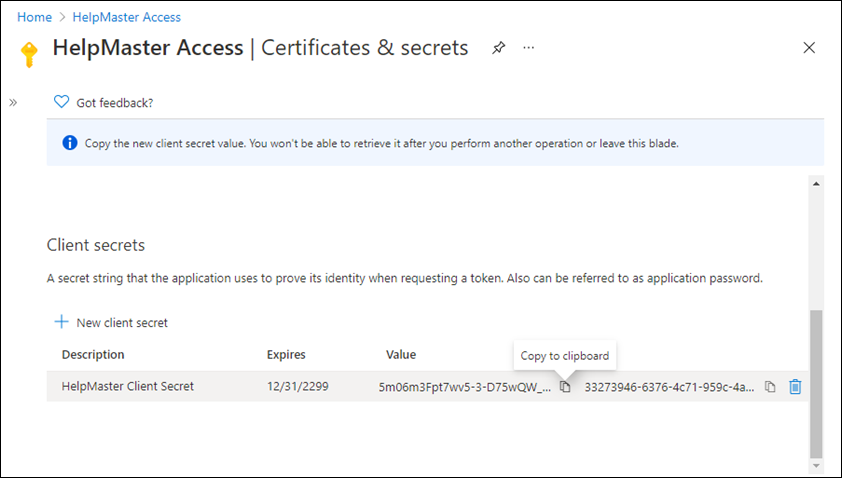
This is the only opportunity you will have to copy this secret, so ensure that you do it at this step. If you navigate away from this tab/page/panel, you will lose the opportunity to copy the secret and you will have to create a new secret.
- Copy the secret from the Value column - click on the copy icon, or select and copy it manually. You may wish to save the secret somewhere safe, or just keep it on the clipboard to paste into HelpMaster.
If receiving the secret by email to paste into HelpMaster, the email client may replace certain characters to match the client language settings. This will result in an invalid secret when entered into HelpMaster and the Azure Test may fail even though the secret looks correct. Copy it from a password manager or plain text file if this occurs.
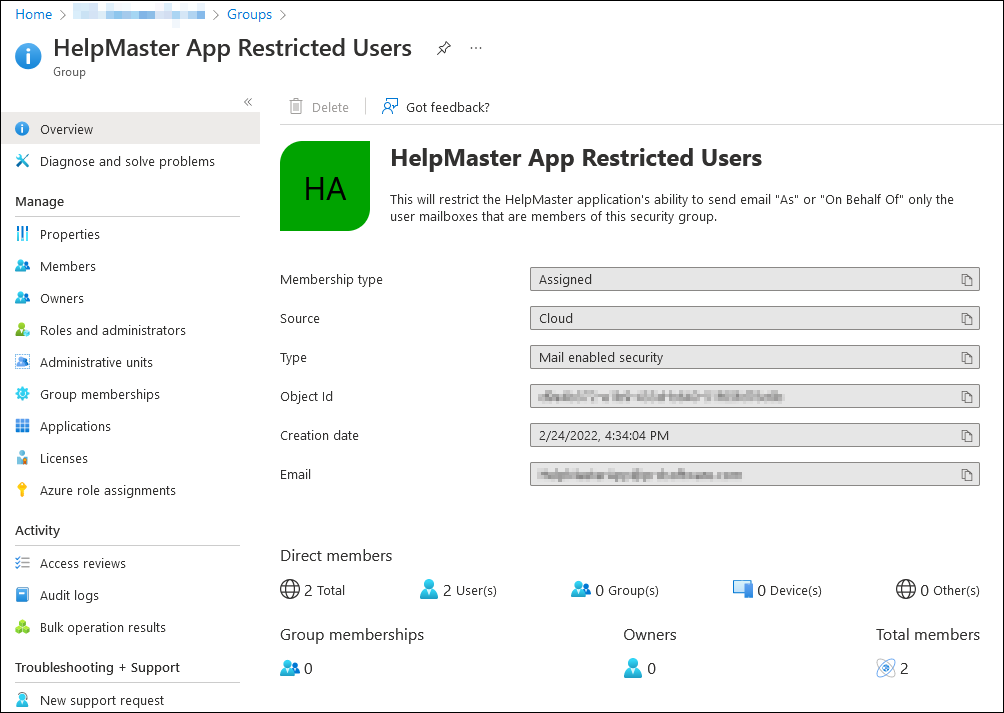
Your Microsoft 365 HelpMaster app is almost ready to be used by HelpMaster. The next step is to create a Mail-enabled security group to restrict access.
It is highly recommended to restrict this access to only the mailboxes that you actually want to send or scan email from. This is achieved by creating a Mail-enabled security group and ApplicationAccessPolicy as outlined in steps 4 and 5 below. It is not functionally necessary but highly recommended NOT to skip these steps.
Step 4 - Create a Mail-enabled security group
In this step we will create a group to restrict the Mail.Send and/or Mail.ReadWrite API permissions to access only selected user mailboxes and exclude access to all others.
-
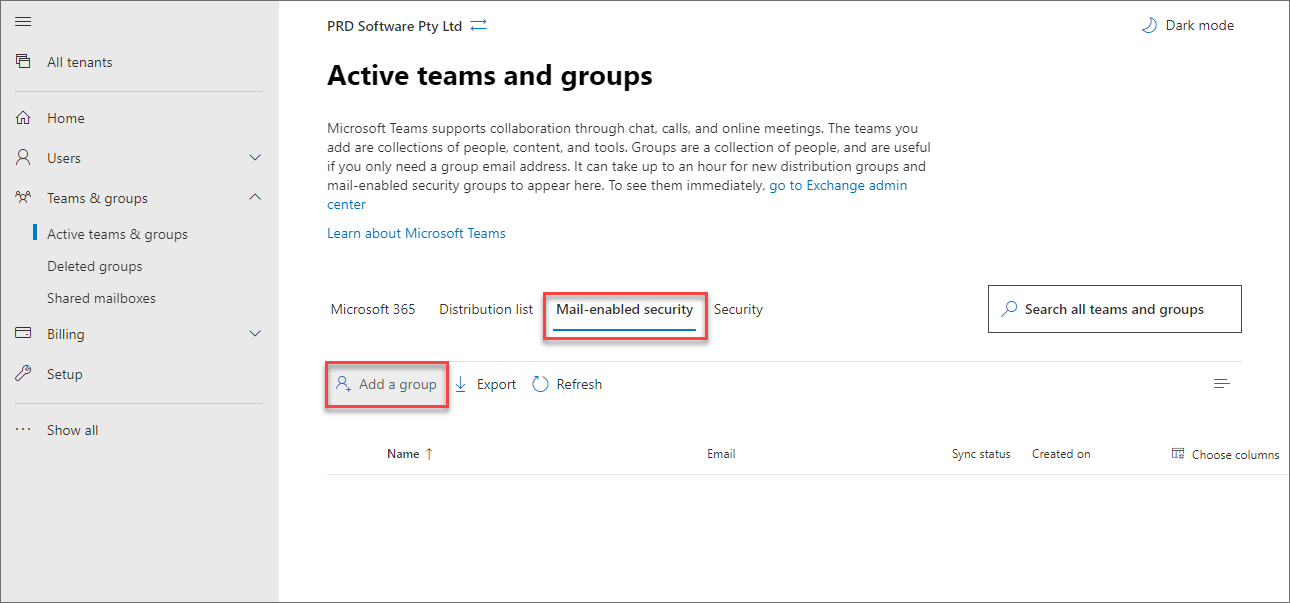
Go to Microsoft 365 admin center (Microsoft 365 Admin centre) > Teams & groups > Active teams & groups and select Mail-enabled security
-
Click Add a group and select the group type Mail-enabled security followed by Next
-
Enter a Name and Description of the new security group followed by Next
-
Enter a Group email address (required but not used) followed by Next
-
Review the new group details and click Finish to create it (It can take from 20 to 60 minutes for these settings to take effect)
-
Select the new group and add members by clicking Members followed by View all and manage members and + Add members
-
From the list search and select (tick) the user mailboxes HelpMaster requires access to
Step 5 - Create an ApplicationAccessPolicy based on the Mail-enabled security group
This step will create an ApplicationAccessPolicy to restrict access to only the members of the Mail-enabled security group above. This can only be accomplished via the Exchange Online Powershell console.
-
Open a PowerShell v7 console window as an Administrator. Install PowerShell v7.xx if necessary
-
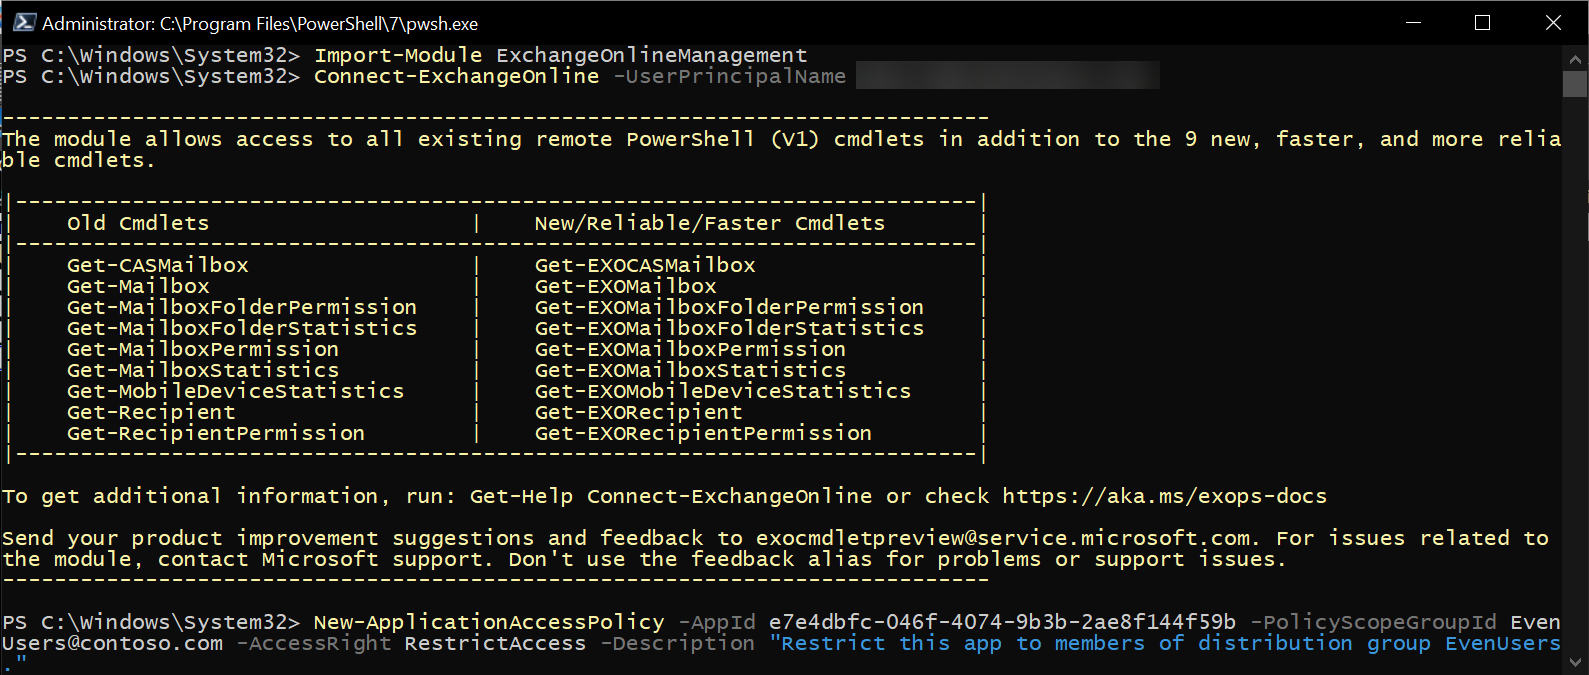
Connect to your Exchange Online Powershell console using
followed byImport-Module ExchangeOnlineManagementAuthenticate your login as promptedConnect-ExchangeOnline -UserPrincipalName (Your Microsoft 365 admin login email address) -
Copy the following Powershell script, and modify the arguments of the script with your specific details from your app registration created earlier. For further information about this step, refer to this Microsoft article Limit mailbox access with Microsoft 365
New-ApplicationAccessPolicy -AppId e7e4dbfc-046f-4074-9b3b-2ae8f144f59b -PolicyScopeGroupId HelpMasterApp@YourDomain.com -AccessRight RestrictAccess -Description "This will restrict the HelpMaster application's ability to send email "As", "On Behalf Of", or "Read/Write" only to the mailboxes that are members of this security group."
- -AppId = Your Application (client) ID from the HelpMaster app you created in step 1
- -PolicyScopeGroupId = The email address of the Mail-enabled security group you created in step 4 above
- -Description = Your description of this ApplicationAccessPolicy within quotation marks
- Check that your modified PowerShell command is correct. Click <Enter> to execute the command. It should look something like this…
Once the Powershell script has run successfully, your HelpMaster app registration should now be linked to the Mail Enabled security group to limit the mail access to only the members that were selected.
Adding / Removing members once the group has been created and linked
Once the mail-enabled security group has been created and linked to the HelpMaster app registration via the powershell script, you can add/remove mailboxes to the group in order to grant access to them via the Exchange Administration Portal (Microsoft 365 Admin groups). Be sure to select the group from the Mail-enabled security category otherwise the changes may not be saved correctly.
Microsoft 365 may take 20 to 60 minutes for these group permissions to take effect. Do not conclude that it is not working until you have waited at least 60 minutes after completing ALL steps on this page
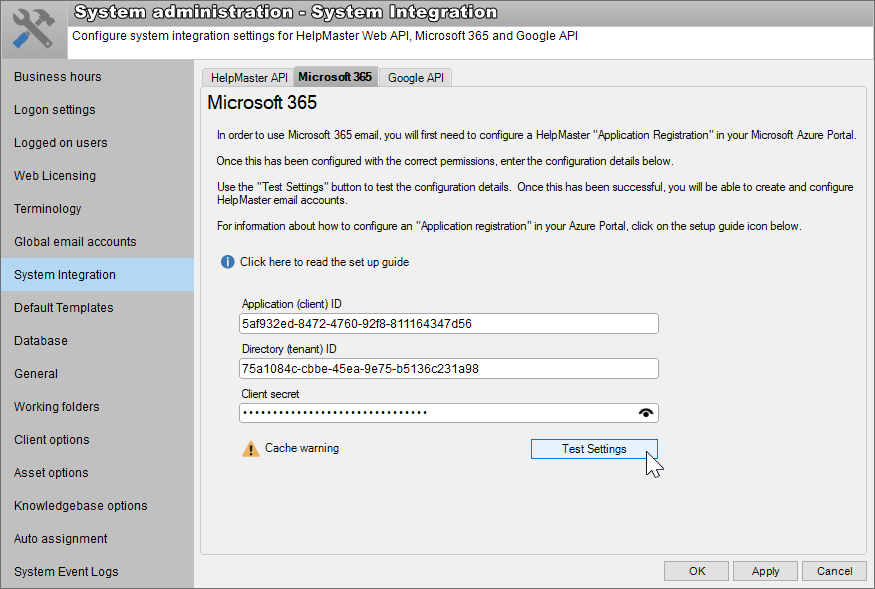
Step 6a - Configure the Microsoft 365 settings in HelpMaster v21 & v22
The final step is to copy the configuration settings from your Azure portal into HelpMaster v21 or v22.
Working in the HelpMaster Desktop application, navigate to the following screen:
Administration menu > System Administration toolbar button ![]() > System Integration > Microsoft 365 tab
> System Integration > Microsoft 365 tab
- Copy the Application (client) ID, Directory (tenant) ID and Client secret from Azure to HelpMaster in the corresponding text boxes
- Click Test Settings to ensure that authentication and configuration is correct
- If you get a Microsoft 365 Authentication was successful message box, click Apply to save your configuration
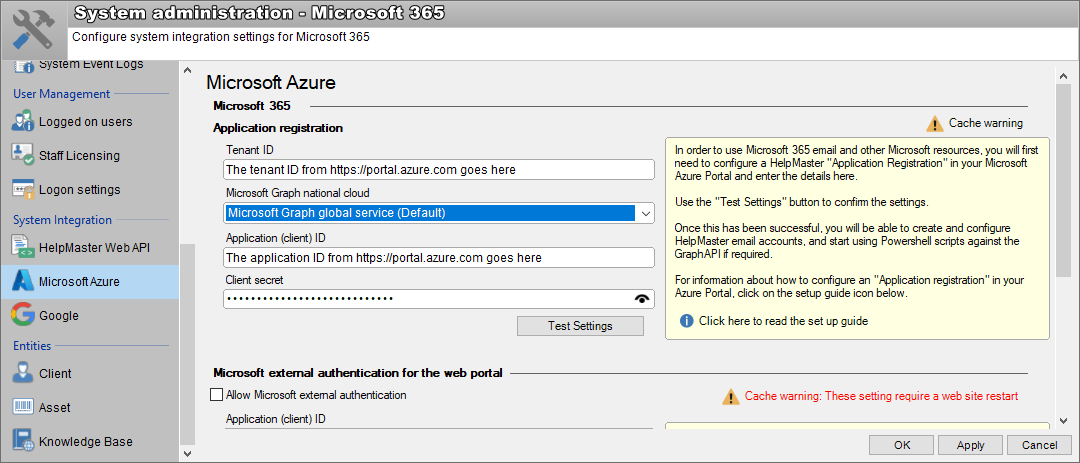
Step 6b - Configure the Microsoft 365 settings in HelpMaster v23 & above
The final step is to copy the configuration settings from your Azure portal into HelpMaster v23 & above.
Working in the HelpMaster Desktop application, navigate to the following screen:
Administration menu > System Administration toolbar button ![]() > System Integration section > Microsoft Azure
> System Integration section > Microsoft Azure
- Copy the Directory (tenant) ID, Application (client) ID, and Client secret from Azure to HelpMaster in the corresponding text boxes
- Select the desired Microsoft Graph national cloud e.g. Microsoft Graph global service (default) for most countries
- Click Test Settings to ensure that authentication and configuration is correct
- If you get a Microsoft 365 Authentication was successful message box, click Apply to save your configuration
Once this step has been completed successfully, create or edit a HelpMaster email account that uses this Microsoft 365 connection. See Email Account Configuration.
See also
HelpMaster Service Access to Microsoft 365
Register an application with the Microsoft identity platform (External link)
National cloud deployments (US Government / China (External link))
Limit mailbox access with Microsoft 365 (External link)
Create a new Microsoft 365 application access policy (External link)
Connect to Exchange online with Powershell (External link)
Feedback
Was this page helpful?
Glad to hear it! Please tell us how we can improve.
Sorry to hear that. Please tell us how we can improve.