Securing Internet access to the web portal
Security considerations
Opening up an internal domain server to the Internet could severely compromise the security of the server that is hosting the web portal. Therefore the following minimum steps should be taken in securing the server and the web portal.
 Permissions checklist!
To complete this step, you will need:
- Domain Administrator access to the HelpMaster or IIS server hosting the web portal
- HelpMaster administrative access
- Experience or certification configuring Internet Information Services (IIS)
- Administrator access to Microsoft 365 Admin Center or your domain registrar’s control panel
- Administrator access to your router/firewall appliance
- Local Administrator access to the client computer
HTTPS access only on port 443
The IIS binding for the web portal should be configured to only accept HTTPS connections. This will require obtaining an SSL certificate from a registered third party certificate authority (CA) as outlined below.
Step 1: Create an SSL certificate request
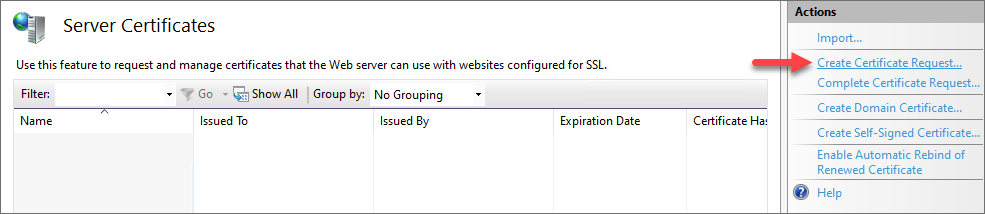
- From IIS Manager double click the Server Certificates icon
- On the Actions panel click the Create Certificate Request… hyperlink
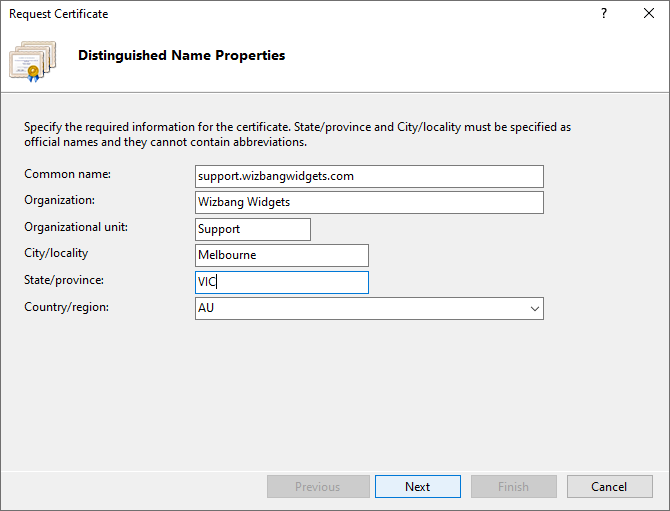
- Fill out the Distinguished Name Properties and for “Common name:” it’s usually best to enter the actual url for quick identification e.g. support.wizbangwidgets.com. Then click Next
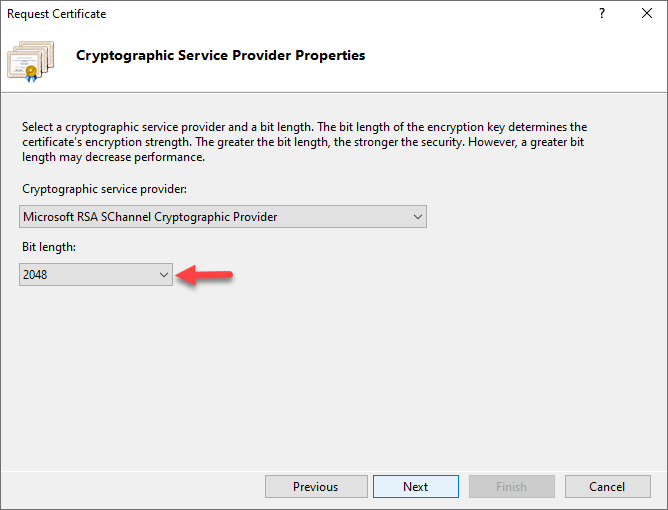
- From the Cryptographic Service Provider Properties select at least 2048 for the Bit length, then click Next
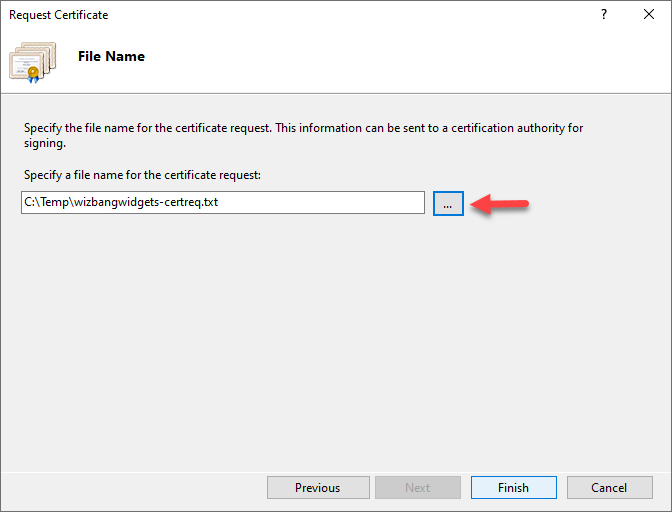
- Browse to the location where you would like to save the certificate request file followed by the filename
- Browse to your third party CA, purchase the SSL certificate required and submit the certificate request file
Step 2: Import the SSL certificate
- When you receive the certificate from the third party CA, go back to IIS and double click the Server Certificates icon again
- This time on the Actions panel click the Complete Certificate Request… hyperlink, then click OK
- Browse to the location of the new certificate and select it. Type in a Friendly name and leave the certificate store set to Personal
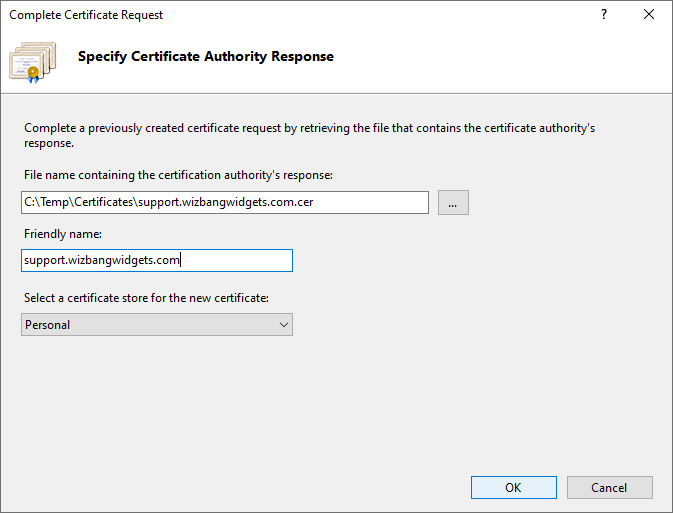
- This will import the certificate and it will be displayed in the Server Certificates list. This certificate is now ready for binding to a web site
Step 3: Bind the certificate to the web portal
- From the IIS Connections panel expand the server connections list followed by the Sites tree
- This should list your HelpMasterWeb and HelpMasterWebAPI sites. Select the HelpMasterWeb site
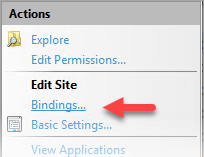
- On the Actions panel click the Bindings… hyperlink
- From here click Add… and select Type: https, enter the Host name: e.g. support.wizbangwidgets.com, and select the SSL certificate: imported in step 2
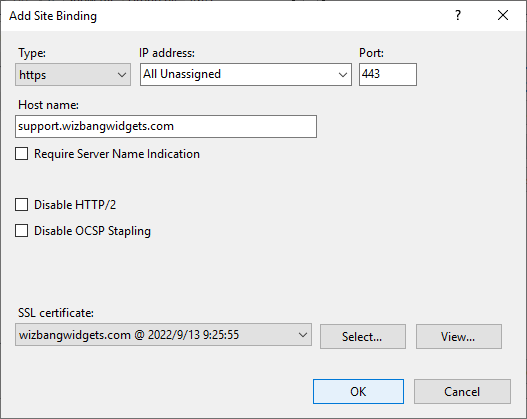
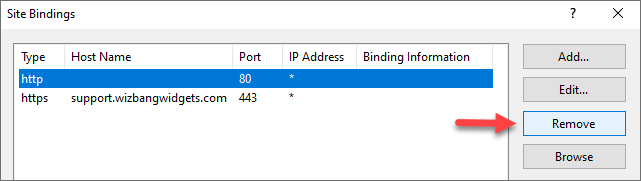
- Click OK and remove any unwanted default or non-secure bindings
You now have minimal security on your HelpMaster web portal for public Internet access.
Step 4: Add a new DNS “A” record to point to the web portal host
Follow the steps below to add a custom DNS A record which points the generated sub-domain to your web portal host. This will require a Static External IP address on your router/firewall provided by your ISP or Microsoft Azure. If your DNS records are hosted by your domain registrar, you will have to login to their control panel and create a new DNS A record there. The process will be slightly different for every domain registrar but you should be able to follow these basic steps.
- Sign in to the Microsoft admin center at https://admin.microsoft.com or your domain registrar’s control panel
- Go to the Settings > Domains page
- On the Domains page, select the domain corresponding to your desired external web portal url e.g. wizbangwidgets.com
- Under DNS settings, select Custom Records; then select New custom record
- Select the DNS A type record and type in the sub-domain Name e.g. support and the Static External IP address of your router/firewall
- Select Save
It can take up to 48 hours for new DNS records to propagate to most DNS servers around the world, but usually it takes 15-30 minutes. The full url to your web portal in the above example will be the sub-domain support.wizbangwidgets.com.
Step 5: Add HTTPS port 443 forwarding to the web portal host
To allow external Internet traffic to access the web portal, from your router/firewall, you will need to open and forward HTTPS port 443 to the machine hosting it. This will require administrative access to your router/firewall device or server. Configure as follows.
- Login to your router/firewall device or server as an admin user
- Usually on a Security or NAT Forwarding page, find Port Forwarding also known as Virtual Servers
- Add a new port forwarding item and select the TCP protocol, enter the LAN host IP Address (this should be the fixed internal IP address of your web portal host)
- Set the WAN and LAN ports both to 443. If a port range is required just put in 443 to 443 into both
- Apply to save the changes
Step 6: Adding browser Internet trusted sites
In order to be able to browse to and Windows authenticate with the HelpMaster web portal, any host names/urls may need to be added as trusted sites to your browser configuration as follows.
Microsoft Edge, and Google Chrome browsers
- Open Internet Options from Control Panel (or from Internet Explorer on the Tools menu) and click on the Security tab
- Click on the Trusted sites zone, then click the Sites button
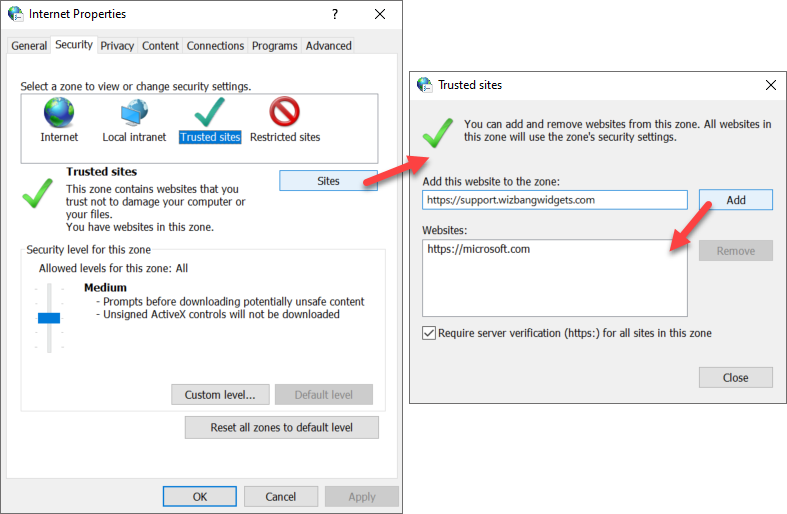
- Add your HelpMaster server IIS Host FQDN e.g. https://support.wizbangwidgets.com to the Websites: list and Close
- Now click on the Custom level… button and scroll to the bottom of the Settings list
- The setting Automatic logon with current username and password should be selected for Windows authentication passthrough
Firefox
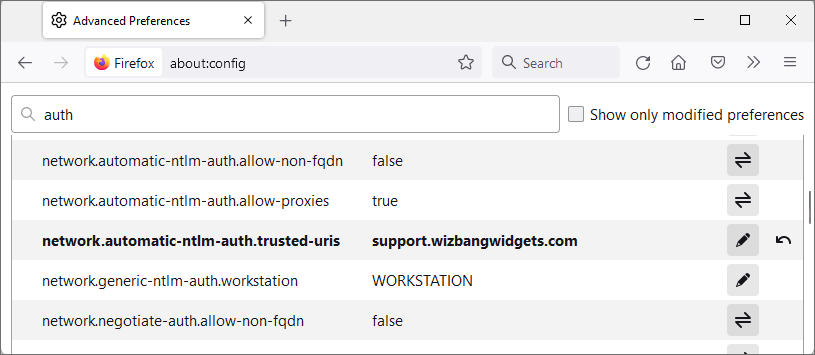
This is outside the scope of ordinary configuration options that are available in Firefox. So it must be configured using advanced about:config configuration pages.
- Open your Firefox browser
- In the address bar type about:config and hit enter
- In the filter, type auth and hit enter
- Locate the entry network.automatic-ntlm-auth.trusted-uris, double click on this entry and add the HostName to the Value property where HostName is either the machine name or the designated IIS [HostName] of the Web Server serving the HelpMaster requests. For instance, if the web portal is hosted at https://support.wizbangwidgets.com, add support.wizbangwidgets.com to the list. Multiple items may be added using a comma (,) separator
If any of the above options are not available for change then please contact your domain administrator to update these options via Group Policy.
Step 7: Adding allowable Windows authentication hosts over the Internet
In addition to step 6, for Windows AD authentication to succeed without prompting for Domain authentication credentials for every new browser session, the allowable authentication hosts need to be added to the client Windows machine via the Registry Editor as follows;
- On the client machine click Search, type ‘regedit’, and then click OK,
- This opens the Registry Editor. Navigate to the following registry key: HKEY_LOCAL_MACHINE\SYSTEM\CurrentControlSet\Control\Lsa\MSV1_0,
- Right-click MSV1_0, point to New, and then click Multi-String Value,
- Type or copy BackConnectionHostNames as the name, and then press ENTER,
- Right-click BackConnectionHostNames, and then click Modify,
- In the Value data box, type the host name(s) of the base web portal address e.g. support.wizbangwidgets.com of the IIS server hosting the web portal. (If more than one, put each on a new line) and then click OK, e.g.
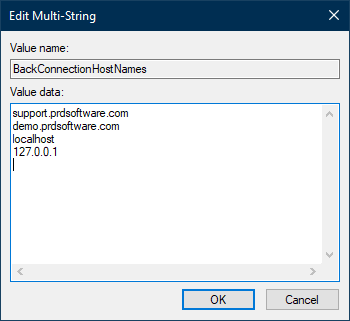
This will now allow the client browser to pass-through Windows AD authentication credentials seamlessly and without prompt as long as the user is logged into the machine with their domain credentials. No VPN or remote access is required after completing this step on each client machine.
Testing the above
After the DNS record in step 4 has finished propagating (allow at least 24 hours), test browsing to the web portal using an external endpoint and type it in the following format https://support.wizbangwidgets.com. If everything works correctly you should now be able to browse to your HelpMaster web portal from anywhere, and AD Windows authentication should also work.
Additional security measures are also highly recommended as follows…
- Configure HTTPS Strict Transport Security (HSTS)
- Configure Custom Headers
- Modify HTTP Response Headers
- Host the web portal on a DMZ server
- Implement a secure hybrid network
See Also
Configuring application settings
Setting and resetting client passwords
Feedback
Was this page helpful?
Glad to hear it! Please tell us how we can improve.
Sorry to hear that. Please tell us how we can improve.