Administration
All modifications to an asset are logged and tracked via the System Event Log
![]() Asset system codes that appear in drop-down boxes eg. Asset Status and Asset Type are administered via the System Codes screen.
Asset system codes that appear in drop-down boxes eg. Asset Status and Asset Type are administered via the System Codes screen.
Assets can be created manually (below), or Imported from an XML file
Creating an Asset
- Open the Assets screen by selecting Assets from the Entities menu
- Click New
- Enter the Asset details and fill in all of the fields as appropriate
- Click Apply
Note - Custom Fields and Control Sets can be configured for use on the Asset Screen also.
Modifying an Asset
- Open the Assets screen by selecting Assets from the Entities menu
- Use the Search function of the Assets screen to find the asset you require
- Select the asset
- Click the Update button, which will open the asset details screen
- Make the required changes
- Click OK to save the changes and close the window
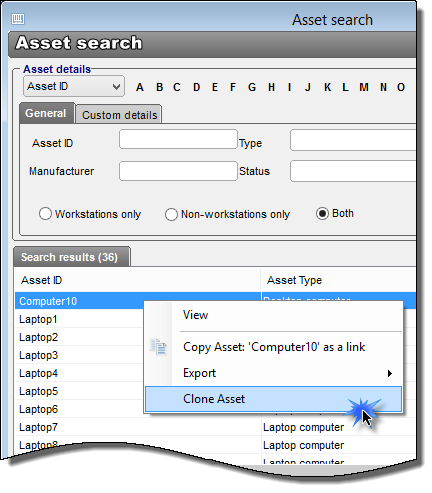
Cloning an Asset
Existing assets can be cloned, or copied.
- Open the Assets screen by selecting Assets from the Entities menu
- Use the Search function of the Assets screen to find the asset you require
- Right click on the asset, and select “Clone Asset” from the pop-up menu
- A new asset screen will appear, populated with most of the details from the previously selected asset. Historical details like job history will not be transferred
- The Asset ID will be duplicated with “Copy” appended to the end. Update the Asset ID as required
- Click OK to save and close the window
Note - Cloning only works on single assets
Linking an Asset
Linking an asset to a job has two main benefits. Firstly, it adds meaning to the job by identifying a piece of equipment that is relevant to that job. Secondly, it builds up a job history for that piece of equipment, which can then be queried at a later date.
You can link an unlimited number of assets to a job.
- Open the Job screen
- Click the Links tab. This will populate the screen with the details of any links attached to the job
- Select the Assets option
- Click the Add button. If a primary client and/or site for the job has already been entered, a popup-menu will appear under the Add button. This will give you the option of searching the assets that are currently linked to that client and/or site.
- Use the Assets screen Search facilities to find the asset you wish to add
- Click Select
- Click Apply or OK in the Job screen
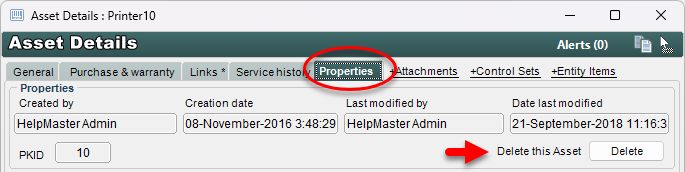
Deleting an Asset
Assets can be deleted outright from the HelpMaster database.
For single asset deletion, open the asset, select the Properties tab and click Delete.
For multiple asset deletion:
- Open the Assets screen by selecting Assets from the Entities menu
- Use the Search function of the Assets screen to find the assets you require
- Select the assets that require deletion
- Click the Delete button. This will open up a confirm delete message box
- Click Yes to confirm
For information about what happens when you delete a asset, see Deleting entities - what happens?
See also
Overview of linking entities to a job
Feedback
Was this page helpful?
Glad to hear it! Please tell us how we can improve.
Sorry to hear that. Please tell us how we can improve.