Custom data - Administration
The first step in creating custom fields is to define the system codes that will give the custom data context. Before performing this step, you should first correctly identify what data type your custom data requirements are. See the Custom Data Overview for a discussion about this.
Creating System Codes
The System Codes screen is accessed by using the Administration > System Codes menu
Once the screen has been displayed, expand the category entitled “User Defined”. This will display the 4 types of custom data types.
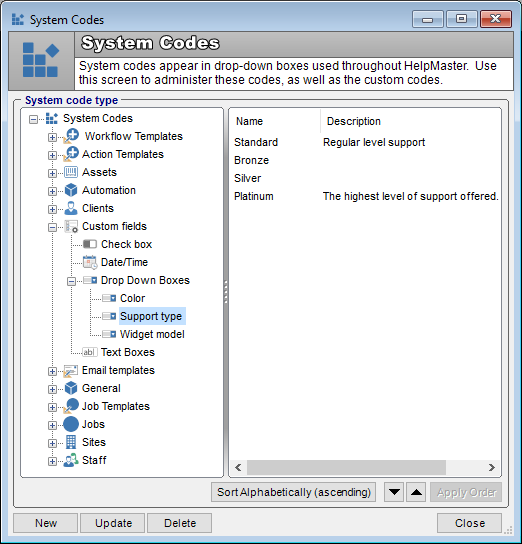
Creating the custom system codes is simply a matter of clicking on the appropriate system code type and clicking the New button, identical to the way regular system codes are administered. The only exception to his is when defining the name for a Drop Down Box where you first need to create the name for the box, then repeat the process for it’s contents.
During this step, the system administrator assigns the custom data system codes that they have defined to entity screens.
Only the system administrator is able to define what custom information appears on the screens of HelpMaster, however this information will appear to all users of HelpMaster.
The User defined fields screen is accessed via the User Defined option on the Administration menu located on the Standard toolbar.
Add a custom field to an entity
Open the User defined fields screen by using the Administration > Custom Fields menu.
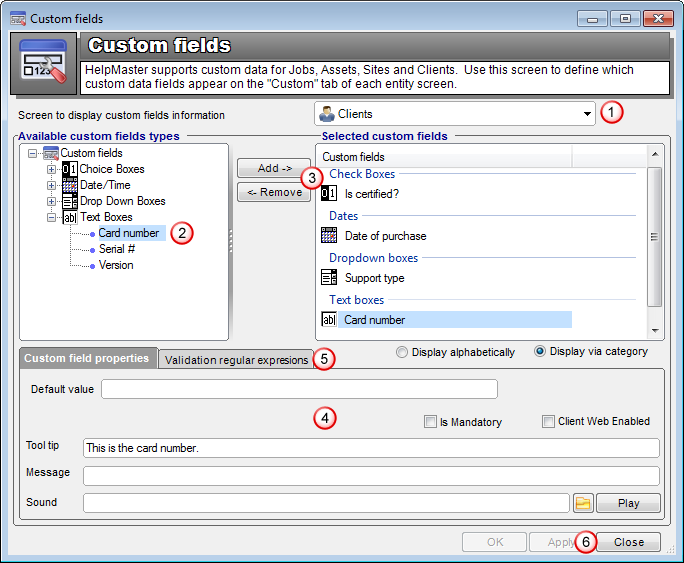
- Select the screen you wish to apply a custom field to from the drop-down box at the top of the screen
- Select the type of field from the Available user-defined types
- Click on the Add button. The User Defined Controls list will be populated
- Apply any default value, tool tip, length, message etc. required
- If using a Text Field, you may define a Regular Expression validation requirement
- Click Apply / OK
- Repeat this process for each of the entity screens that you wish to have custom data defined for
Remove a custom field
- Open the User defined fields screen
- Select the screen you wish to remove a custom field from
- Select the type of field from the Available user-defined types
- Select the field you wish to remove from the User Defined Controls list
- Click on Remove
- Click on the OK button
Mandatory field
When custom data fields are created and added to an entity, there may be times when you want to set rules as to how they are used, and what values are valid. HelpMaster allows system administrators to set the following rules when custom data fields are used.
A mandatory field is a custom field that must contain a value before the entity can be saved. A field is marked as mandatory by checking the “Is Mandatory checkbox” on the Custom Data Fields administration screen.
Validation of custom data values
Text and date custom data fields can be validated via the use of regular expressions. A regular expression is a special type of computer code that will match, or validate text based on certain syntax rules. If you’re familiar to the way a wildcard search operates (using * to substitutes characters etc), then think of a regular expression as a much, much more powerful way of searching and filtering text.
For a comprehensive overview of regular expressions and their use, you can use an internet search engine to search for “regular expressions” and visit one of the many excellent internet resources available on the subject.
HelpMaster contains a short list of useful, common regular expressions however it is possible to create an unlimited number of regular expressions to suit your exact data validation requirements by using the Administration > Regular Expression Library
See also
Feedback
Was this page helpful?
Glad to hear it! Please tell us how we can improve.
Sorry to hear that. Please tell us how we can improve.