Creating a new instance of the HelpMaster Web Portal
Before this step, please ensure that you have done the following:
- Installed HelpMaster
- Created your HelpMaster database with the Database and Reports Wizard
- Created your working folders
- Created the HelpMaster Service Account
- Have installed and configured an instance of IIS that will host the web portal
- Have installed the Microsoft .NET Core Hosting Bundle on the IIS machine
Creating a new instance of the HelpMaster Web Portal is made simple via the Web Portal Configuration Manager.
Start the HelpMaster Web Setup wizard by clicking the Windows Start menu and then All Programs > HelpMaster > HelpMaster Web Setup
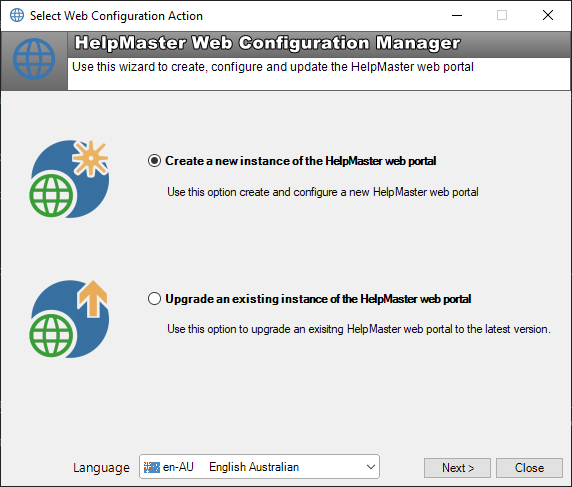
Select Create a new instance of the HelpMaster web portal and click Next >
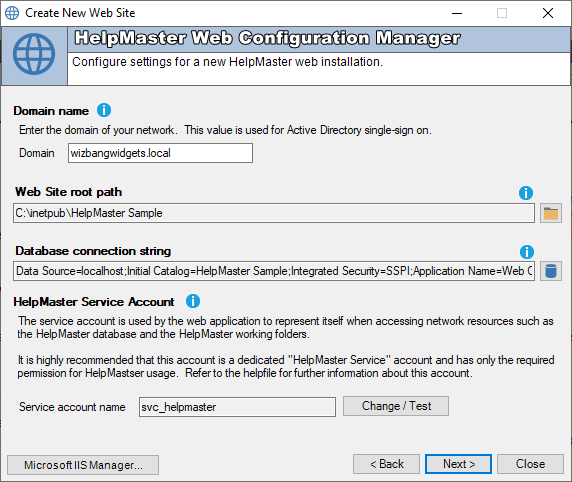
Domain name
This setting is automatically determined and used for Active Directory single sign-in. Check that it is correct and adjust if necessary. This setting can be adjusted later via the Desktop edition if required.
Select the folder where you want to create the HelpMaster web application files
From the Web Site root path select or create a folder where the HelpMaster web portal files will be deployed. This location is known as the IIS physical path. All of the necessary HelpMaster web files will be copied to this location. The default location for IIS web sites is C:\inetpub\, although for security reasons, many organization choose to use a different drive to host websites from. Create a folder here called “HelpMaster”, or “Helpdesk”, or whatever you like. The folder name doesn’t matter it’s just where the HelpMaster files will be stored.
Database connection string
Click the button to browse to your HelpMaster database. If you have not already created your HelpMaster database, use the Database and Reports Wizard to create your database
The HelpMaster Service Account
In order for the HelpMaster web portal to work and access all necessary network resources, you will need to provide a valid domain user account credential that has sufficient network security permissions. The HelpMaster Web Portal will use this Windows account whenever it requires access to resources such as the database, the file system, the Windows registry and other network resources.
- Click on the Change / Test button to enter the name and password of a network account that you use as the HelpMaster Service Account. Ensure that the user name is fully qualified by the domain name. e.g. DomainName\UserName and the password is not blank.
It is highly recommended to use a very strong password for this account.
- Press the Test button to verify that this user has sufficient privilege to run the web portal
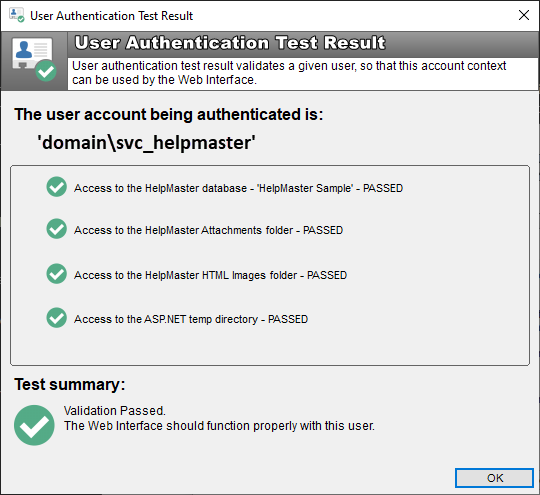
If the test fails on any of the items listed, the HelpMaster web portal will not work. Resolve each failed item and then try the test again. Refer to the following help file pages for assistance.
Test failed for database access
Test failed for working folder access
Set the configuration options for the HelpMaster Web Portal
Select the web site configuration options to be set up in IIS. This includes the following options for both the primary Web site and the API Web site.
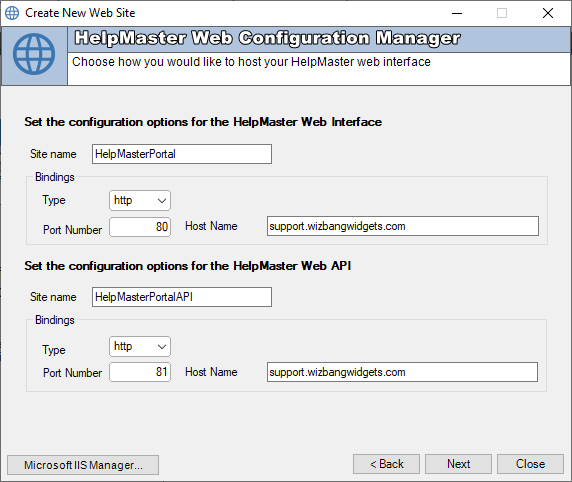
- Site name: Keeping the defaults is easiest but these can be any name as long as the Web and API are unique. These names are not visible to users.
- Type: Select http or https if hosting publicly on the Internet.
- Port Number: Select either a unique port number for each or the same shared port number if specifying unique host names.
- Host Name: Specify the site names you wish to appear in the URL if sharing port numbers e.g. http://ITHelpdesk
Deploy the site/application
Click the “Next” button to show a final summary and progress bar to create your HelpMaster web portal
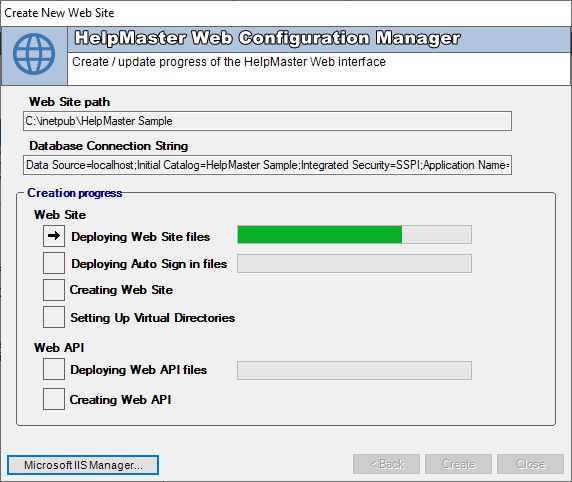
Click the “Create” button to create your HelpMaster web portal.
Browse to the web portal for the first time
On successful completion of the above steps, you will be provided with two URLs at the bottom of the screen. You should now be able to access the application by clicking the HelpMaster Web Portal URL hyperlink or by clicking the Copy button and pasting it into the address bar of your web browser.
The first time you access the Web Portal, expect a short delay while IIS and .NET compiles the application - subsequent visits should be quicker.
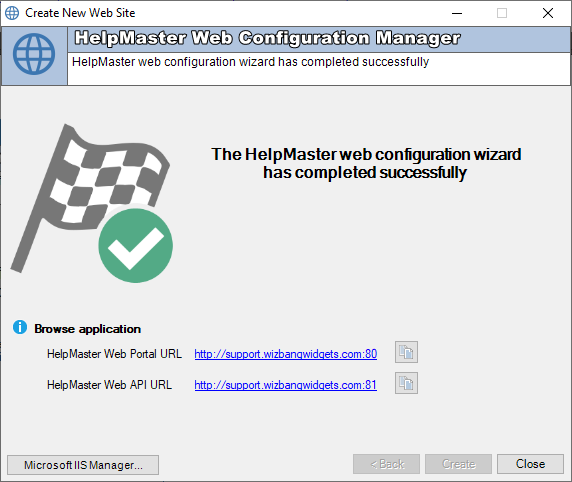
HelpMaster Web Portal URL
The HelpMaster Web Portal URL which should take you to the logon page of the application. The HelpMaster Web Portal URL format may look like the following depending on your hosting configuration:
http://hostname:port/
HelpMaster Web API URL
The HelpMaster Web API URL provides advanced users with the ability to create custom applications that portal with HelpMaster and its database.
See Also
Upgrading from a previous version of the web portal
Feedback
Was this page helpful?
Glad to hear it! Please tell us how we can improve.
Sorry to hear that. Please tell us how we can improve.