Designing Action Templates
Action Templates play an important role in the configuration of HelpMaster, and are used in various features of the software to update jobs, create workflow, send email and more. Designing a solid set of Action Templates will allow you to use HelpMaster in the most efficient way and leverage these vital features.
Remember that Action Templates are primarily used to update jobs and send email, so when designing them, think about what it is you want to update, and what type of email to send.
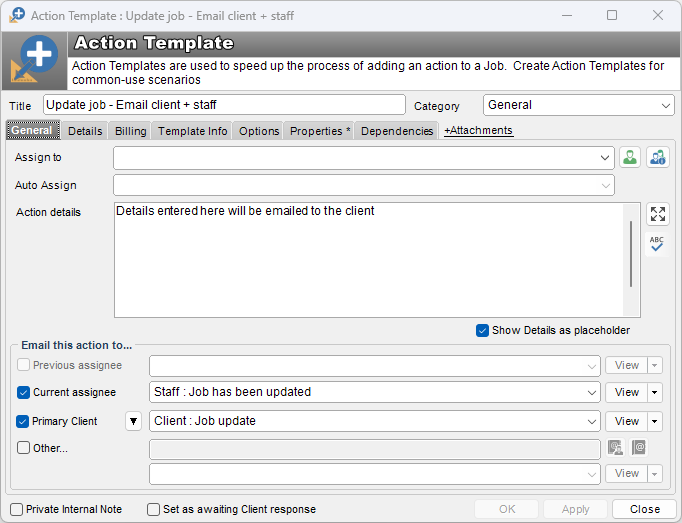
The General tab
Name
Each template must have a name. Consider giving it a name that is not only descriptive of what it does, but also alludes to the workflow process that it might be part of. This will help you identify and recognize the template when you need to find and use it later.
Category
Select a category to classify the Action Template. Categories can be created via the System Codes screen. Classify similar Action Template with the same category. This will assist with searching, grouping and finding templates. Choose a grouping classification system that makes sense for your organization.
Assign to
This is an optional field. Select a Staff member, or a Skillgroup to assign the job to. Leave it blank if you want to force the staff member using the Action Template to select. Use the Queue check button to the right of this drop-down box to display the Queue Check screen.
Auto Assign
This field becomes available if a Skillgroup is selected in the Assigned to field. Choose an appropriate auto-assign option.

See Auto Assign for further information
Action details
This is an optional field. Any text entered here will also be displayed in the Action screen when the template is used. The staff member using this Action Template may choose to use this text, or over-type with their own. Text entered here may be used as prompting text, or instructional text to the staff member performing the job update. Check the “Show Details as placeholder” checkbox to display the text as a placeholder prompt.
Use the checkbox options on the Security tab to force staff members to update the template text when they use this template to update a job.
Email this action to…
Every action that is performed within HelpMaster, either via a template or otherwise has the ability to send email as part of the job update. Any email that is sent here is either an Email Template, or an email that is composed as part of the update. Use this section of the Action Template screen to pre-fill these details with relevant information.
Previous assignee
Only becomes relevant when the job is being re-assigned. The Previous Assignee is the person/skillgroup that the job is being reassigned away from. Use this checkbox to send them an email to let them know that they have just lost a job. Consider creating a dedicated Email Template for this purpose. You could also use a generic “Reassign” email template. In the event that the Previous Assignee is a Skillgroup (the job was assigned to the skillgroup unassigned queue rather than someone specific), the email will be sent to the address as specified in the Skillgroup Email Settings.
New assignee
The new assignee option only become relevant when the job is being re-assigned. The New Assignee refers to the staff member or skillgroup that the job is being assigned to. Consider creating a dedicated Email Template for this purpose. You could also use a generic “Reassign” email template. In the event that the job is assigned to a Skillgroup (rather than someone specific), the email will be sent to the address as specified in the Skillgroup Email Settings.
Primary Client
The Primary Client option refers to the Primary Client for the job. This client’s name will appear in the form title bar of the Action Screen, or is visible from the Links tab within the job. Use the drop-down arrow next to the checkbox to select other client options.
Other…
When checked, an email will be sent to whatever email address is typed into the Other textbox. This address may be an Exchange Group name, or multiple email addresses that have been delimited via either a comma, or a semi-colon.
The Details tab
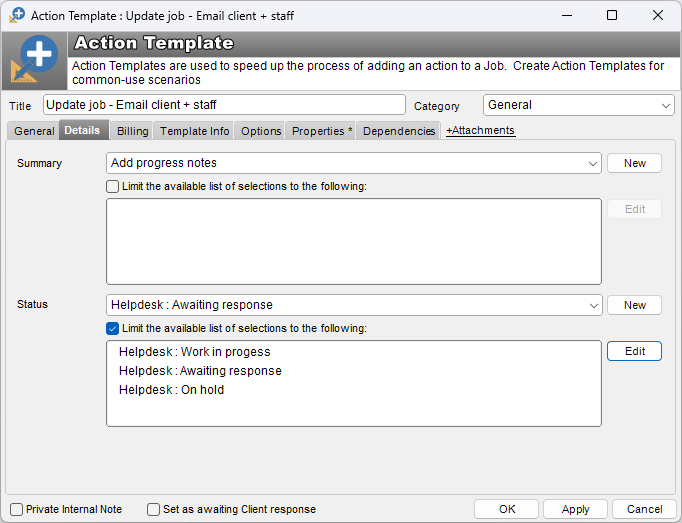
Summary
The Action Summary code is optional in the Action Template, but mandatory when updating a job via an action. The purpose of the Action Summary code is to classify the nature of the action/update that has just been performed on the job. This code can give meaning to reports, statistics, searching, and is a good visual field when viewing the Action Log for a job. It can also be used to trigger automation events. Action Summary codes are administered via the System Codes Administration screen
Examples include
- Phone call
- Add note
- Install Software
- Install Hardware
etc..
Check the “Limit the available list fo selections to the following” checkbox to choose a short-list of available Action Summary codes that the user can use when using this Action Template. This feature allows you to limit the choices the user can use and can be beneficial for workflow and process flows.
Status
The Job Status code is option in the Action Template, but mandatory when updating a job via an action. The purpose of the Job Status code is to indicate the current state of a job. Read further information about the Job Status Code
Check the “Limit the available list fo selections to the following” checkbox to choose a short-list of available Action Summary codes that the user can use when using this Action Template. This feature allows you to limit the choices the user can use and can be beneficial for workflow and process flows.
Billing tab
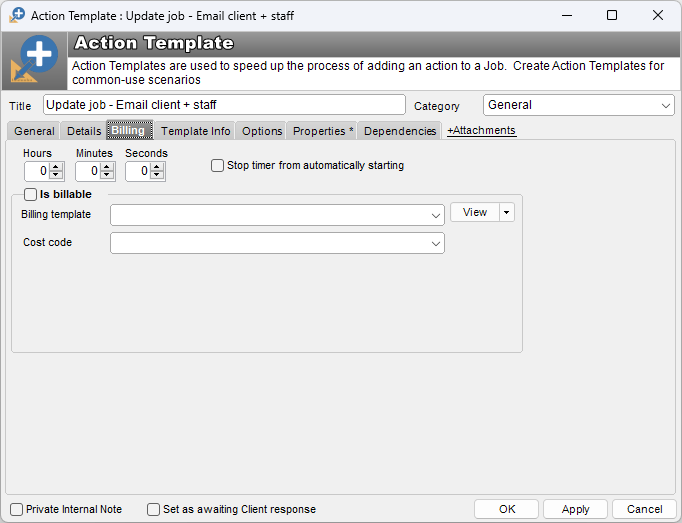
If Billing is enabled via the System Options, this set of options allows you to configure the billing information that will be pre-filled when the template is used. See Billing for further information.
Template Info tab
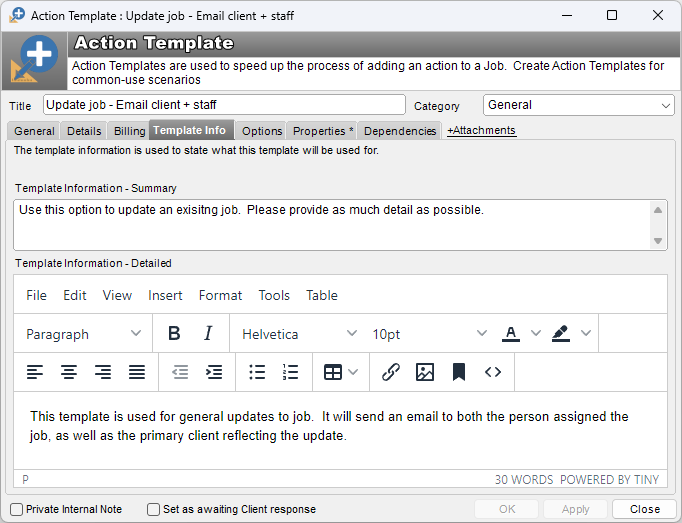
Optional. Any information entered here will be displayed throughout the product (Desktop + Web) in various locations whenever this Action Template is displayed, or used. This information may be used to guide staff or clients about the use of the Action Template.
Options tab
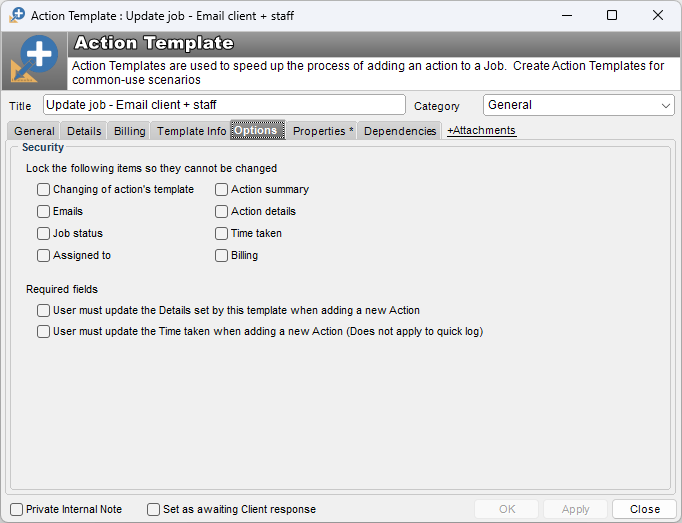
Use the options tab to configure how this Action Template is used, and any restrictions that you wish to enforce.
Lock the following items so they cannot be changed: Select any of the available action fields so they cannot be changed when this template is used.
Required fields: Select action Details or Time taken to enforce entry, or updating of these fields. New for v23 - (Does not apply to quick log).
Properties tab
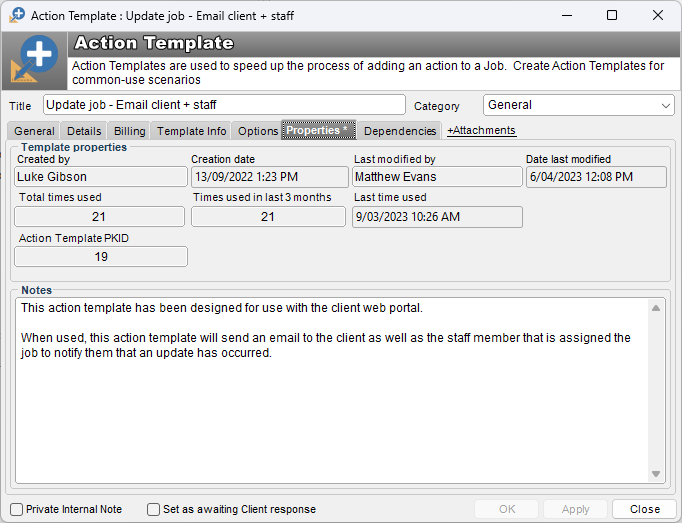
Displays meta-data about the template. The Properties tab displays…
Template properties: Displays useful read-only information about the template’s creation and usage.
Notes: Enter notes about it’s purpose and how it should be used.
Dependencies tab
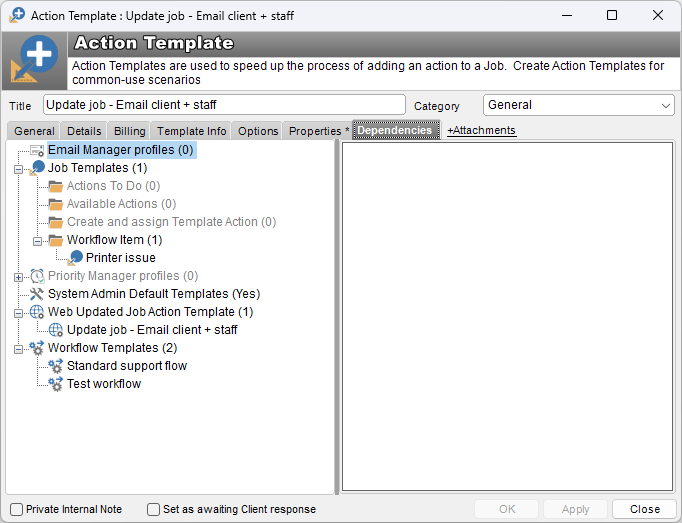
Displays information about where this template is used by other templates and components within HelpMaster.
See also
Template Information dock panel
Web Portal
Building a request catalog for self-service
Feedback
Was this page helpful?
Glad to hear it! Please tell us how we can improve.
Sorry to hear that. Please tell us how we can improve.