Microsoft 365 Azure
Microsoft 365 authentication can be configured to authenticate users when logging into the HelpMaster web portal. This is done through a Microsoft App registration that is created in your Azure tenant (by you). HelpMaster will use this app to authenticate the user via OAuth using their Microsoft 365 (M365) account. Your Azure administrator will need to create this App registration and a Client secret (app password) to enable authentication with M365 accounts.
 Permissions checklist!
To complete this step, you will need:
- Azure administrative access (https://portal.azure.com)
- HelpMaster administrative access
Once this has been created and configured, you will need to copy the app configuration details from your Azure tenant and copy them into the HelpMaster Desktop location, Web toolbar > Web Settings icon > Web logins tab > External Authentication Providers section, so that the HelpMaster web portal can use it to authenticate. Each web portal user will also have to enable the Microsoft External login option from their Account settings while logged into the web portal.
Step 1 - Create and configure your Microsoft HelpMaster Web Portal App
- Log in to your Microsoft Azure Portal at portal.azure.com with an administrator account
- Navigate to Azure Active Directory > App Registrations
- Click New registration
- Enter a name. eg. HelpMaster Web Authentication
- Select either Accounts in this organizational directory only (Your org - Single tenant) or another depending upon the scope you require
- Under Redirect URI (optional), select the Web platform (Note that this is NOT optional for this configuration)
- In the Redirect URIs box, type the base url to your HelpMaster web portal and add /signin-microsoft to the end of it
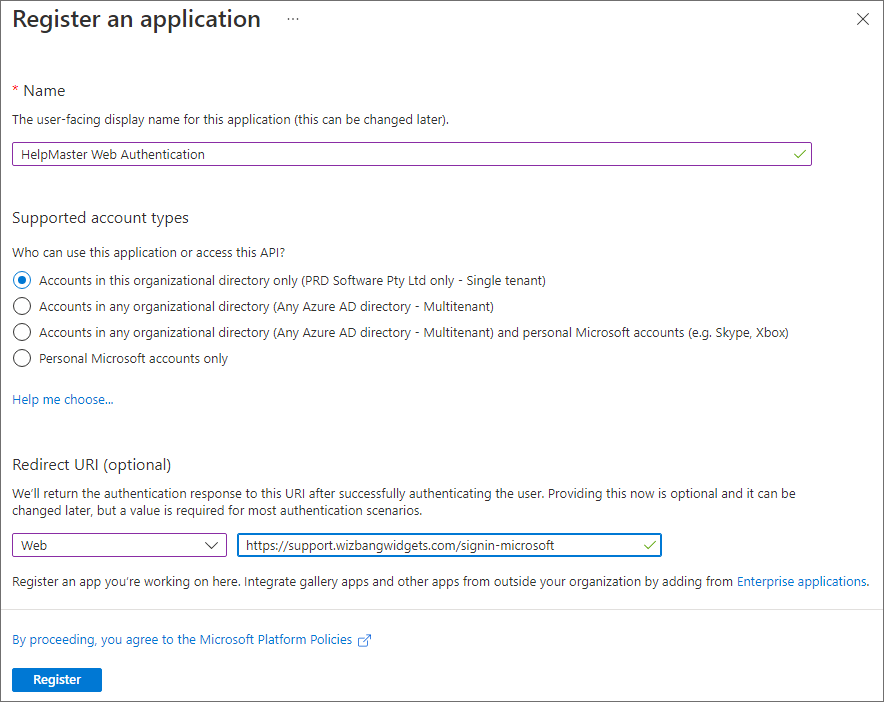
- Click Register to create the app registration
Step 2 - Grant API Permissions
Once the app has been created, you will need to configure what Graph API permissions it will have access to. The minimum permissions that the HelpMaster web portal requires is access to read user profiles (User.Read) information so as to find the user trying to authenticate.
| HelpMaster module | Functionality | Permission Required | Permission Type |
|---|---|---|---|
| Web Portal | Sign in and read M365 user profile | User.Read | Delegated |
- Click View API Permissions (if you’re still on the initial screen, or API Permissions from the left-side menu)
- Click Add a permission
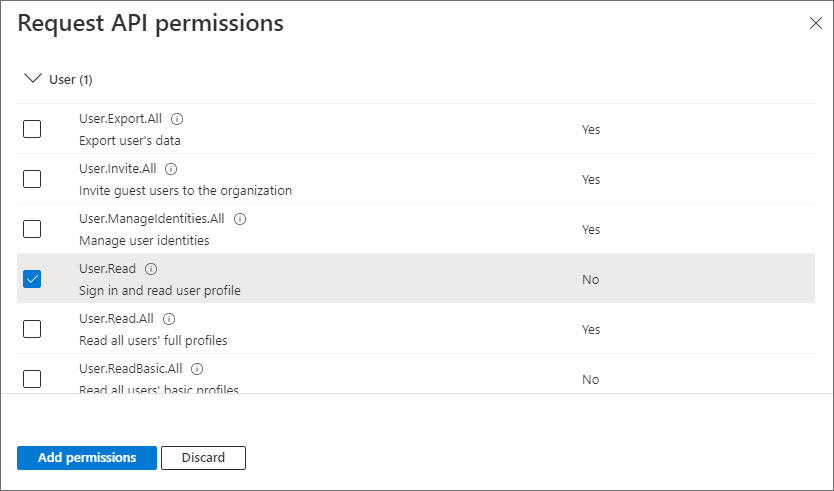
- From the Request API permissions panel, click the top panel Microsoft Graph
- Click on Delegated permissions at the top and scroll down to the User section and expand it
- Select (tick) User.Read (Sign in and read user profile)
- Click Add permissions
Microsoft 365 permissions delay
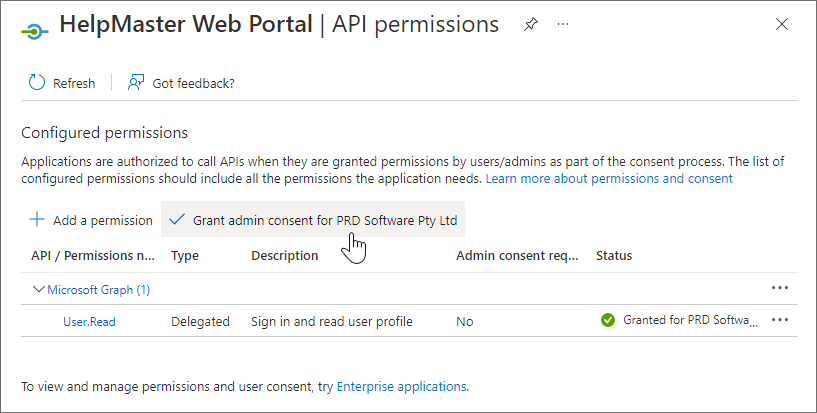
Microsoft 365 may take 20 to 60 minutes for these permissions to take effect. Do not conclude that it is not working until you have waited at least 60 minutes after completing ALL steps on this pageOnce the API permissions have been granted to the HelpMaster web portal app, you may also grant admin consent for all users within your Azure tenant, so that they do not have to consent themselves. Granting admin consent is not required but each user will have to consent to using their own Microsoft account if admin consent is not granted.
- To Grant admin consent for [Your Organization] click the option and Yes to the confirmation prompt
Step 3 - Create a Client Secret
In order to be able to use the app within HelpMaster, you need to configure a Client Secret for the app.
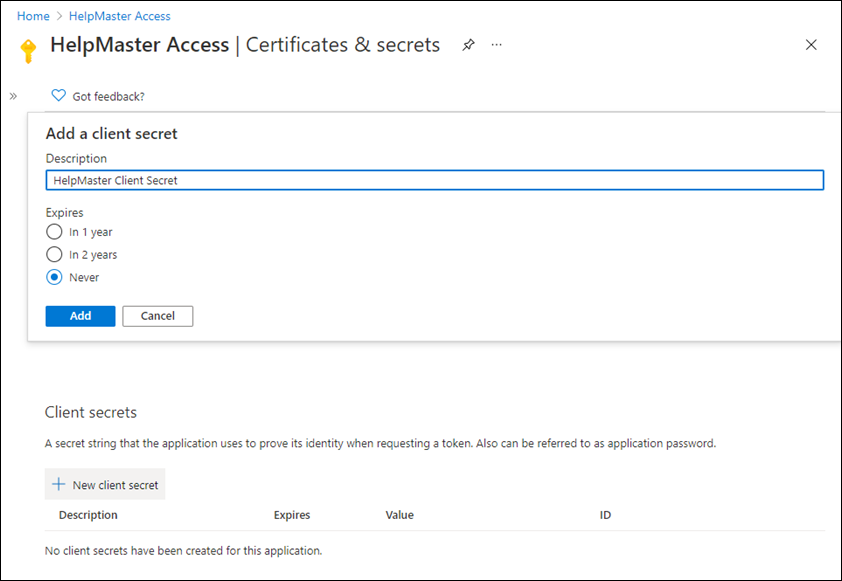
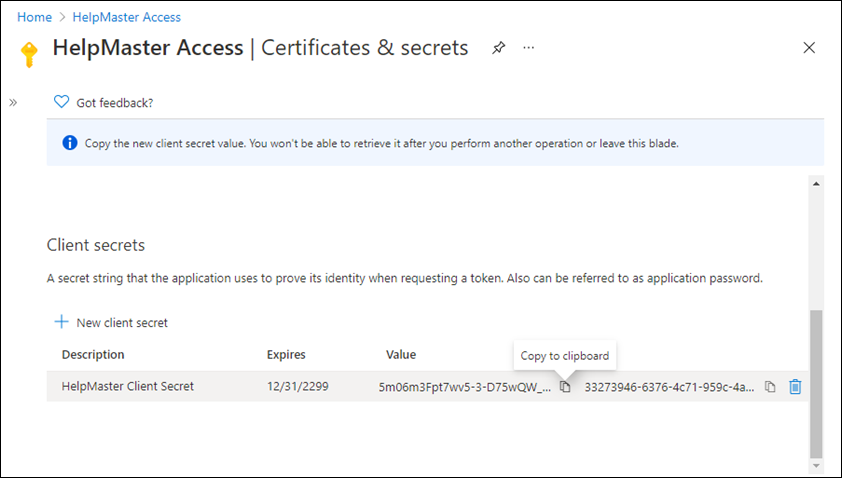
- Click Certificates & secrets from the left-side menu
- Click New client secret
Configuration Notice
This is the only opportunity you will have to copy this secret, so ensure that you do it at this step. If you navigate away from this tab/page/panel, you will lose the opportunity to copy the secret and you will have to create a new secret - A dialog box will appear prompting for a Description of the secret. This is a descriptive label only - it isn’t the secret. Enter the descriptive name and set the expiry to your preference. Note that if the secret expires, M365 authentication of the HelpMaster web portal will stop working. You will then need to create a new secret and re-enter this value into HelpMaster. Click Add
- Copy the secret from the Value column - click on the copy icon, or select and copy it manually. Save the secret somewhere safe for pasting into HelpMaster in step 4 below
Step 4 - Copy the app details into HelpMaster
The final step is to copy the configuration details from your Azure portal into the HelpMaster Desktop app at Web toolbar > Web Settings icon > Web logins tab > External Authentication Providers section, so that the HelpMaster web portal can use it to authenticate.
- Copy the Application (client) ID from the app’s Overview page, to HelpMaster’s Account ID field
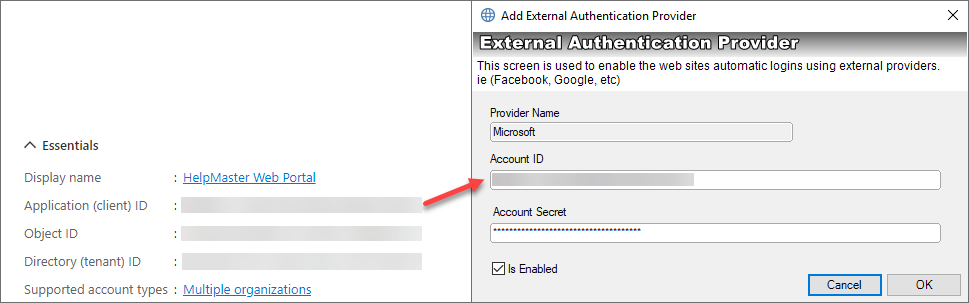
- Copy the Client secret saved in step 2 into the Account Secret field
- Check (tick) the Is Enabled box to enable the provider
- Click OK to save your configuration
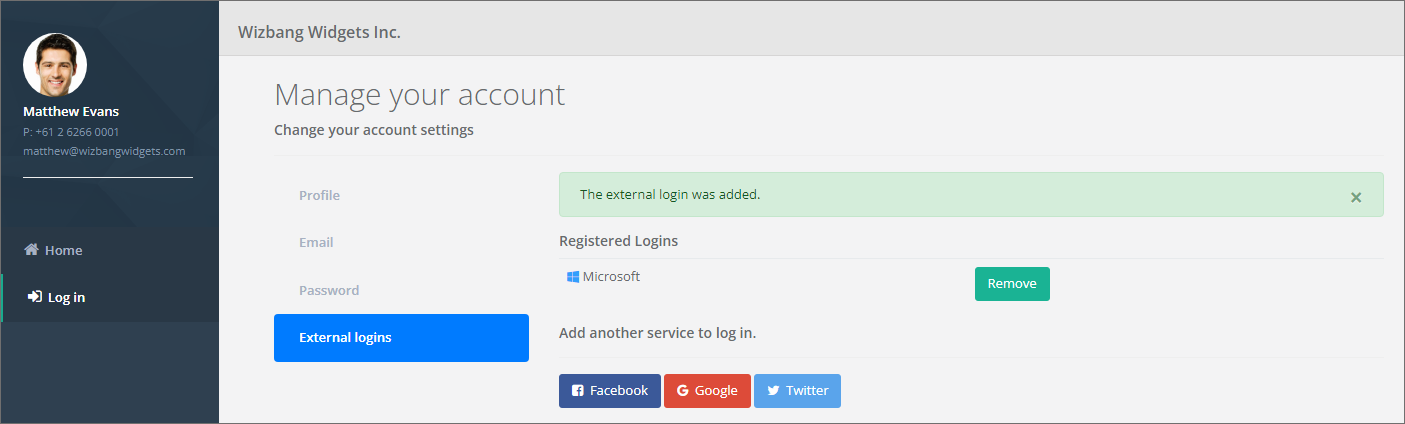
Step 5 - Each user must enable the Microsoft external login
- Login to the HelpMaster web portal using built-in or AD authentication
- From the My Account drop-down select Account settings followed by External logins
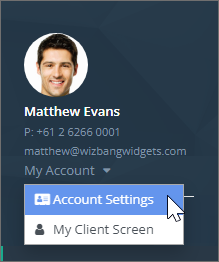
- Click on the Microsoft icon to enable login via your Microsoft 365 account
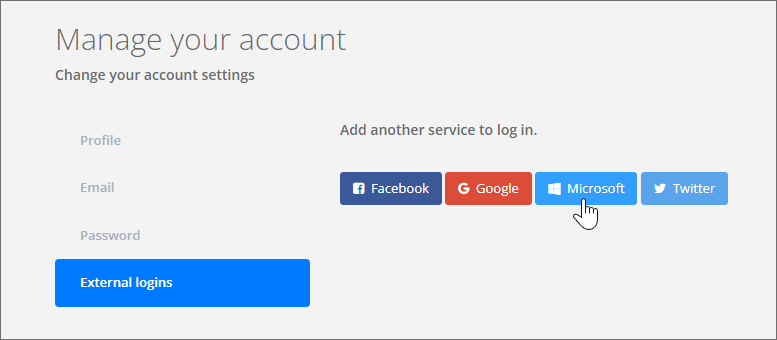
- If “admin consent” wasn’t granted then each user will need to consent at this point. Consent to the web portal app if prompted to do so
- Log out from the web portal and test logging back in using the Microsoft button from your web portal logon screen
If all is configured correctly, clicking the Microsoft icon (from the web portal login screen) should seamlessly log you into the web portal using your Microsoft 365 credentials as long as your Work or school account has been added to Windows. See instructions on how to do this using the first link below.
Revoking Microsoft external login
-
Login to the HelpMaster web portal
-
From the My Account drop-down select Account settings followed by External logins
-
Click on the Remove button next to the Microsoft registered login

See also
Microsoft 365 web authentication for HelpMaster v23 and above
Add work or school accounts to your PC
Register an application with the Microsoft identity platform
Create a new Microsoft 365 application access policy
Feedback
Was this page helpful?
Glad to hear it! Please tell us how we can improve.
Sorry to hear that. Please tell us how we can improve.