Importing data procedure
Administration toolbar > Maintenance section > Import Wizard icon 
-
Login to HelpMaster as an administrator and select Import from the Administration menu.
-
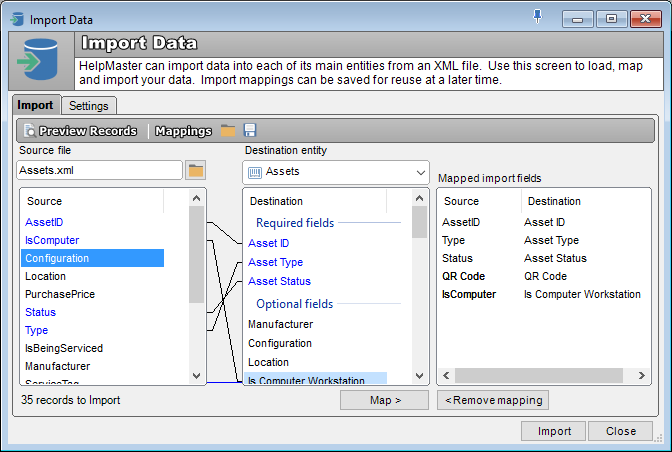
On the Import tab, click the browse button (next to the Source file field) and open the source file containing the data you wish to import.
-
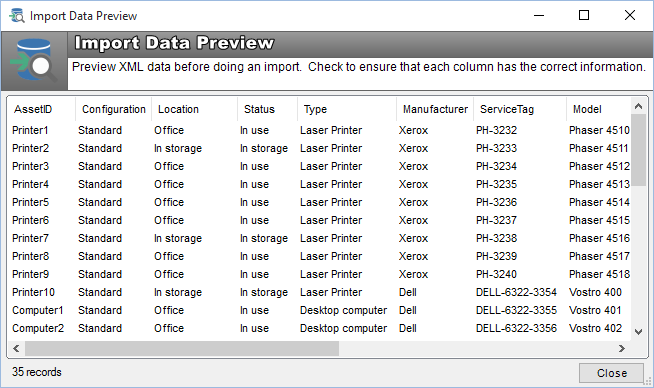
Click on the Preview button to display the data source
-
Drop down the Destination entity list, and select the HelpMaster entity you wish to import data to. The entity field list underneath will then display the available fields to import into.
-
Select the source file field, and then the destination entity field you wish to map it to. Click the Map button to map the two fields. They will then appear in the Mapped import fields list. Repeat this procedure until all required fields have been mapped.
-
Click the Import button to begin the importing procedure.
-
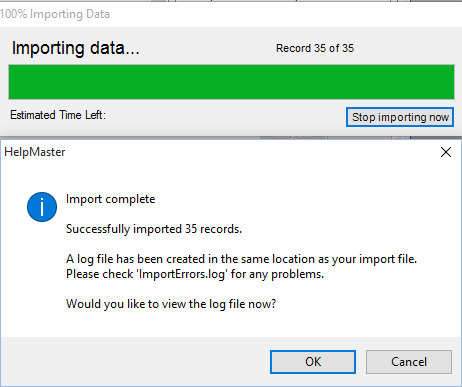
A status bar will appear to indicate the progress of the import. Click the Stop importing now button at any time to halt the import.
-
When the import is complete, a dialog box will appear and display the number of records that were successfully imported.
-
A log file named HMPImportErrors<timestamp>.log is created in the same folder as the import .csv file. This will list any problems that were encountered and records that were not imported as a result.
See also
Feedback
Was this page helpful?
Glad to hear it! Please tell us how we can improve.
Sorry to hear that. Please tell us how we can improve.