Email Templates Administration
Templates toolbar > Email Templates section > Email Templates icon ![]()
The administration of Email Templates is subject to the security permissions assigned to the logged-in user.
Creating a new Template
- Open the Email templates search screen by selecting Email templates from the Templates menu.
- Click on the New button.
- Enter the Name, category, type, subject, message and add any attachments.
- Enter any properties required.
- Click on OK.
Updating a Template
- Open the Email templates search screen by selecting Email templates from the Templates menu.
- Select the required template email by using the search facilities of the screen.
- Click on the Update button.
- Make the necessary changes.
- Click on OK.
Deleting a Template
- Open the Email templates search screen by selecting Email templates from the Templates menu.
- Select the required template, by using the search facilities of the screen.
- Click on Delete.
- Click on Yes in the confirmation message box which will appear.
Using Template subscriptions
- Open the required email screen.
- Select the template you wish to apply to the email, from the drop down list. This will automatically fill in the associated areas of the email.
- Complete with the email in the usual manner.
- Click Send.
The Email Template Screen layout
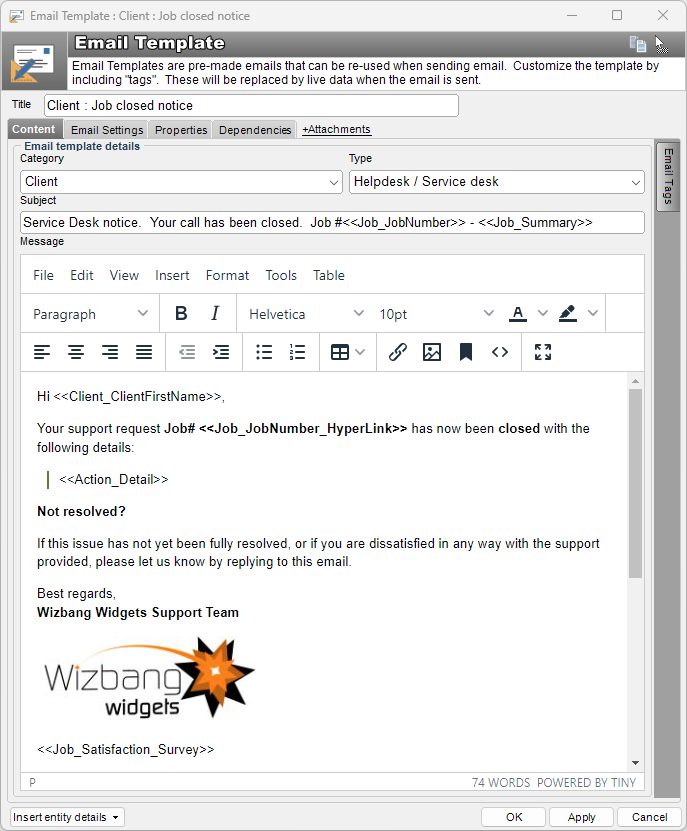
The Content Tab
Title : A short description to identify the template. It is a best practice to use some sort of naming convention for this field as this will make it much easier to locate, identify and understand the purpose of the template if the name of it follows a well-understood naming convention.
Category : A pick-list of terms used to describe the template category. Category options are administered through the System Codes screen. The Category code appears as an available field in the Field Chooser for Email Templates. This field is used to sort, classify and search for Email templates.
Type : A secondary pick-list of terms used to describe the category. Type options are administered through the System Codes screen. The Type code appears as an available field in the Field Chooser for Email Templates. This field is used to sort, classify and search for Email templates. Default values include “Complete”, “Introduction” and “Conclusion”. These values may be edited via the System Codes screen, however they may be useful to classify an email template and its intended use. For example, an email template marked as “Conclusion” may simply be a signature, or document footer that can then be re-used when creating new templates. See the “Insert other email template button” description below.
Subject : When an email template is used to send email, this field will be inserted into the subject of the outgoing email. The subject field can accept email template tags, and is a vital field in the configuration and use of the Email Manager, particularly when automatically scanning and replying to in-coming email from an already existing job where the Job # tag is used.
Message : This field contains the content of the email. It can be formatted as either HTML, or plain text, and this is toggled via the format drop-down box on the editing toolbar. The message field can accept email template tags, and is a vital field in the configuration and use of the Email Manager, particularly when automatically scanning and replying to in-coming email from an already existing job where the “reply between the lines”, or similar email scanning technique is used.
Attachments Tab
Attachments : This tab allows any attachment to be linked with the Email Template. When the template is used to send email, any attachments listed here will be sent with the email.
Email Settings : The email settings tab allows an email account to be specified for the Email Template.
Insert system tags button : Use this button to display a pop-up menu of all of the available email template tags. Once a tag is selected, it will be inserted into either the subject, or the message body at the position of the cursor.
Insert other Email Template button : Use this button to insert another email template into the one you are editing. When you click this button, the Email Template search screen will appear. You can then search and select an email template that will be inserted into the one you are editing at the cursor position. When the search screen is displayed, you may find it useful to sort the list of email templates via the “Type” column, and select the appropriate email template. See the “Type” description.
Email Settings Tab
The Email Setting tab contains information about the context and email account of this email template.
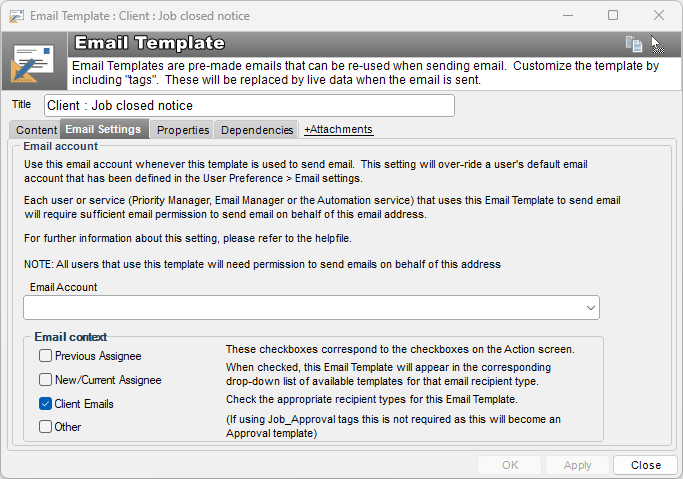
Email Account: Optional. Select an email account that this template will use. If not selected, email will be send via the default account of the person, or module using this template.
Email Context: Check appropriate checkboxes to display the email template on the Action Screen.
The Properties Tab
Displays meta-data information about the email template.
The Dependencies Tab
Displays information about how the email template is used by other templates and components within HelpMaster.
See also
Feedback
Was this page helpful?
Glad to hear it! Please tell us how we can improve.
Sorry to hear that. Please tell us how we can improve.