Job Finder
Jobs toolbar > Find section > Job Finder icon ![]()
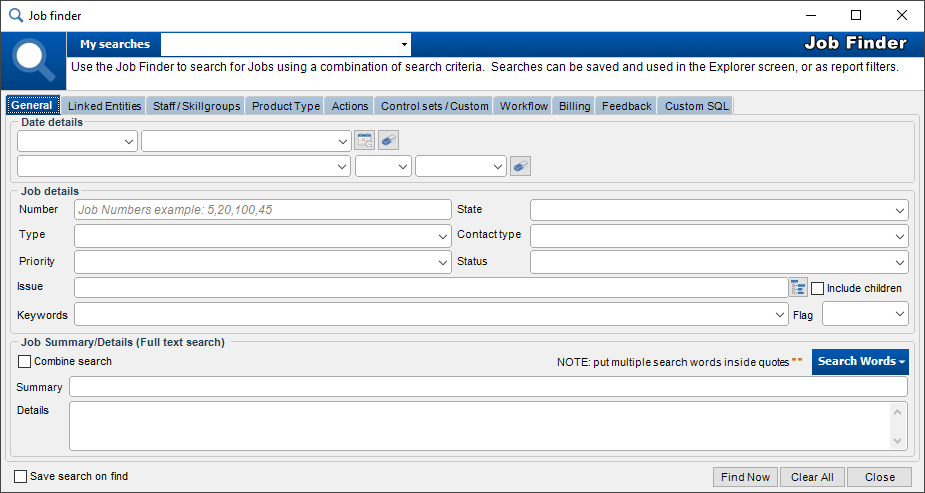
Job Finder is a powerful search feature of HelpMaster that allows jobs that have been already logged to be located quickly and easily. By specifying information about the job(s) that you wish to locate, HelpMaster will compile a list of jobs that match the criteria that has been entered.
The results from Job Finder are displayed in a common list format and can be actioned as per usual.
Job finder can be accessed via the Jobs ribbon toolbar.
Use with the Priority Manager
The Job Finder is also used by the HelpMaster Priority Manager to search for jobs that are involved in Priority Manager Profiles
Use with running reports
The Job Finder is also used when running reports. Before a report is run, it is likely that you would like to filter it to a certain range of jobs. By clicking on the “Filter” button on the Reports selection screen the Job Finder will be displayed which will allow you to specify the report filter.
General Use for finding jobs
Access the Job Finder by clicking on the Job Finder icon in the Jobs ribbon toolbar.
Custom SQL tab
The Custom SQL tab is used to generate the SQL that corresponds to the search criteria that has been configured using the Job Finder. This is useful for advanced searching and custom implementations for reports, searching or general database queries. To generate SQL, use the Job Finder screen as usual to define the search, and then click the “Generate SQL” button on the Custom SQL tab. This SQL can then be used against your HelpMaster database.
Once custom SQL has been generated, it can be updated and modified to create SQL that may not be otherwise generated by the Job Finder. This is useful for custom reporting applications, or to generate a “Saved Search” that is otherwise impossible via the default Job Finder capabilities. Use the “Check SQL” button to validate any custom SQL.
Basic Searching
- Open the Job finder
- Enter your search criteria by selecting it/them from the appropriate drop down lists.
- Check the Save search on find box if the search is likely to be required often.
- Click on Find Now.
Saving Your Search
If you checked the Save search on find box the screen below will have the screen below appear when you click on Find Now.
- Enter a name for the saved search.
- Check the Add to Explorer screen box if desired. If this is checked, this search will appear under the “Saved Searches” section within the Explorer for the staff member who created this search.
- Click on OK.
See also
Use the job finder to filter reports Report Filtering
Use the job finder in automation Priority Manager Overview
System Administration Security Setting to enable/disable SQL
Feedback
Was this page helpful?
Glad to hear it! Please tell us how we can improve.
Sorry to hear that. Please tell us how we can improve.