Quick start guide - Administrator basic
Before you begin
It is intended that this Quick Start guide should be followed only after HelpMaster has been installed, and you have been able to logon to the Desktop Edition.
If you are looking for instructions on how to install HelpMaster, or how to configure the database, please refer to the Installation Overview
If you have not done so already, please read the Entity Overview page to get a quick understanding of the different entities/objects that HelpMaster uses.
Quick start for HelpMaster administrators
The following steps are recommended in order to set up your instance of HelpMaster to a basic operational standard.
It is highly recommended that before any configuration settings or system codes are defined, that key staff members other users of HelpMaster get together to discuss the business practices and process that are common to daily operations. This discussion will greatly assist the administrator when configuring HelpMaster. It will be highly beneficial if you can discuss with first level support, second level support, managers and even key clients within your enterprise some of the configuration points listed below. The more input you can gather from your users, the better you will be able to “tune” HelpMaster to serve your helpdesk needs efficiently. It may be helpful to discuss different “helpdesk scenarios”, with different “client profiles” and business requirements.
We suggest that you work through the examples and scenarios on a whiteboard, and discuss the various system codes, issues and workflow processes before starting on the actual software configuration.
If migrating from another system, it may be helpful to discuss what worked, what didn’t and what configuration (if any) to transfer over into HelpMaster.
Preliminary environment configuration
HelpMaster has a number of system-wide configuration settings that should be set before it is used. These settings are global in nature, and are used by various features throughout the product suite.
Use the Administration menu > System Administration button to access these settings.

File Paths (where files and attachments and other things are stored)
Terminology (what you want to call things)
Client ID Auto generation and rules (define how you use and generate a unique client ID for your users and staff)
Microsoft M365 Integration (for email and web authentication)
Email Configuration / Global email accounts
Licensing (allocating licenses to users - circle back to this after you’ve created staff members - see below)
Step 1 - Create / import clients (users)
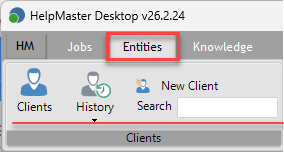
Clients are the people that use the helpdesk. They can be manually created, imported from a text file, or imported from Active Directory / EntraID. Each client is given a unique “Client ID” that can be manually specified, or automatically generated by the system.
Step 2 - Create / import sites (Companies, customer sites, buildings)
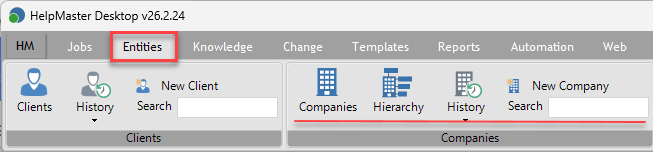
Sites are the companies that your business deals with. A site may represent a company, a building, a location or any other structure that clients, or people can be linked to.
Sites can be organized in a hierarchical manner and can either be entered manually, or imported from a text file. Once a site has been entered, any clients that are linked to it may “inherit” the sites address and contact details.
Step 3 - Create asset information (equipments, items, things)
Assets are items of equipment. If your helpdesk requires an “asset register”, use this step to enter information about them. Once you have a list of assets within your helpdesk, they can be linked to clients, service tickets/jobs and other entities.
Step 4 - Link Clients, Sites and Assets (Optional)

Entities of HelpMaster (Clients, Sites, Assets, Jobs etc.) can be linked together to form relationships. These relational links help to define context, drive automation and reporting, and provide greater insight into how things are related.
Each major entity has a “Links” tab that displays what the entity is linked to, and what other entities are linked to it.
When linking clients to sites, it is possible to nominate one or more linked clients with Site-wide visibility to jobs - even if they are not linked specifically to the job. This is useful when supporting companies and you want to give site-wide viewing to privileged clients (eg. the supervisor/boss/manager etc). See Job Visibility for further details.
Step 5 - Create Skillgroups

Skillgroups are a logical grouping of staff and are used to manage job/ticket queues. Think of a Skillgroup as a business team that has a specific skill-set, or focus. When helpdesk tickets are logged, they will be assigned to a Skillgroup, or to a staff member within a SkillGroup.
Each staff member must be belong to at least 1 SkillGroup, and each Skillgroup must have a designated “Skillgroup Supervisor” which will be one of the members of the Skillgroup
Examples of skillgroups may include:
- Hardware support
- Software support
- Network administration
- Management
- 1st line support
- 2nd line support
- Human Resources
- Paroll
- Facilities Management…etc
Step 6 - Create staff members and assign to a Skillgroup and Security Role
Helpdesk staff are the helpdesk agents that provide support to your “clients”. In HelpMaster terms, a “staff” account is a HelpMaster “client” that has their “Is staff” checkbox checked.
Once a client is converted into a Staff member, that staff member must belong to both a skillgroup and a security group. Once a staff member has been created, they will able to log into HelpMaster and will appear in the Helpdesk Explorer as a “queue-holder”.
Staff members are also subject to licensing constraints.
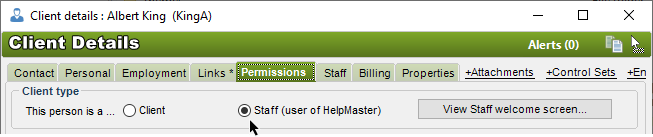
- Staff can be created manually by creating a new “Client” record, and then checking the “Is Staff” option, or
- Users can be imported from Active Directory / EntraID, and then converted into a staff member by checking the “Is Staff” option on the client record.
Step 7 - Define the system codes

This step involves defining some of the common system codes that are used throughout HelpMaster. System codes are the codes that HelpMaster uses throughout the entire program and are usually the options that appear in various drop-down boxes on many of the screens. The system codes define the context of your helpdesk system because they give the different entities meaning when they are associated with them. By default, when you install HelpMaster, a minimum number of system codes for each mandatory category will already exist. Use this first step of the quick start guide to review and change as necessary the default settings. You may find it useful to spend some time with the helpdesk staff and users of HelpMaster to define what codes your helpdesk will use. Talk about different scenarios regarding your helpdesk and the different service level agreements that you have with your clients.
For example:
How many Job Priority codes do you think you will need? 3? 5? 10? What will they be? “Urgent”, “Critical”, “Important”. Which has the higher priority?
What types of Job Status will you use - what is your helpdesk job lifecycle like? You might define codes such as “Open”, “In Progress”, “On-hold”, “Resolved” and “Closed”. Depending on which stage of the job life-cycle, you could associate one of these codes with a job.
This first step is really about going through this system codes screen and adding, updating or deleting any system codes so that HelpMaster is speaking your language.
Step 8 - Define the classification hierarchy

Each helpdesk job needs to be classified. Create a hierarchy of issues/classification codes in this step that will be meaningful to the different “Issues” that arise within your helpdesk environment.
For starters, it may be best to define a few broad, top-level categories. Remember to keep them fairly generic as detailed “children” can always be added.
Example of top level classifications for an IT-related helpdesk may include : Hardware, Software, Training
Examples of secondary classifications may include : Printer, Monitor, Mouse (children of Hardware), Word, Excel, PowerPoint (children of Software) etc.
Remember that the Classification hierarchy can be up to 5 levels deep and each node of the hierarchy can be “dragged” and “dropped” onto another node for easy administration and placement.
Step 9 - Edit and create templates

HelpMaster features a powerful template system for email, ticket/job updates, and logging new tickets/jobs.
Templates are the blueprints for common tasks, and assist with consistency, time-saving, and automation.
Email Templates
Email templates are used to send email to clients, customers, staff and other recipients. Review the existing email templates that are included in the system and consider the following:
- Update the wording of the email
- Update the graphics and signature block to reflect your company
- Create new email templates as required
Action Templates
Action templates are used to update (or action) and existing helpdesk ticket/job. Action templates can update the ticket, change the status, include billing information, send email and more. Out of the box Action templates include:
- Basic ticket update
- Reassign ticket with email notification to the end-user and new assignee
- Change job status
- Close ticket/job
Job Templates
Job Templates are used to create helpdesk tickets/jobs, and form the basis of the web request catalog. Create Job Templates for each different type of request that your helpdesk supports.
Job Templates can reference Action Templates, which in turn reference Email Templates.
Job Templates can also contain workflow that can be used to guide helpdesk staff/agents through a process in order to complete the job.
Step 10 - Create knowledge base articles
Knowledge base articles are documents that contain valuable information about particular issues. These can be referred to by helpdesk jobs and are useful in diagnosing and providing assistance in resolving helpdesk jobs and other business tasks.
Basic steps completed!
Once the previous steps have been completed, you’re in a good position to start logging helpdesk tickets, using templates and using HelpMaster in a basic configuraion.
Advanced Configuration Administration
For more advanced administration topics, click here
Feedback
Was this page helpful?
Glad to hear it! Please tell us how we can improve.
Sorry to hear that. Please tell us how we can improve.