Creating a new HelpMaster database
Creating a new HelpMaster database is easy. Two types of databases can be created with the wizard. These are:
- A blank database
- A sample database
The blank database
The blank database should be created when you wish to create a new database that you will configure for live use. The blank database is completely blank, except for a minimum amount of required system data. The blank database contains the “Admin” staff member. The password for this account is password. It can be re-set once successfully logged in.
The Sample database
The sample database is ideal when you wish to create a training or test database to use with HelpMaster. The sample database contains data from a fictitious company called “WizBang Widgets”. It contains a full client registry, staff, skillgroups, and a range of sample jobs, templates, workflow and other configuration data.
The sample database contains the following administrator staff logons (all passwords are password)
- admin
- evansm
- ashworthm
- kingd
- whitel
- blackh
- carbonej
Use
- Ensure that you log onto a computer using a Windows network account that has sufficient network security access to browse to and copy files to the machine where your SQL Server is installed.
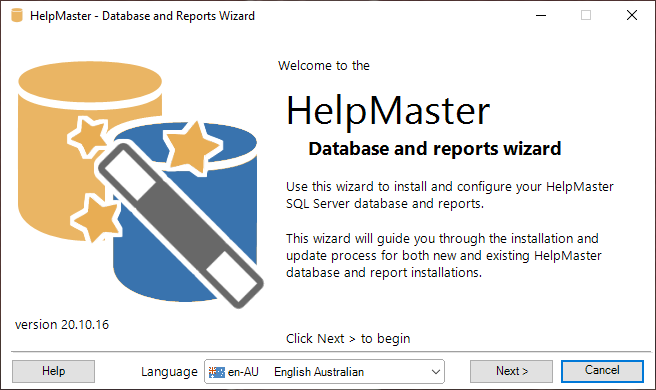
- To create blank or sample databases, run the HelpMaster Database and Reports Wizard by clicking on Start Menu > All Programs > HelpMaster xx.xx > HelpMaster Database and Reports Wizard. Where xx.xx is the version number of HelpMaster that is installed. The following screen will appear. Click Next > to proceed to the main menu.
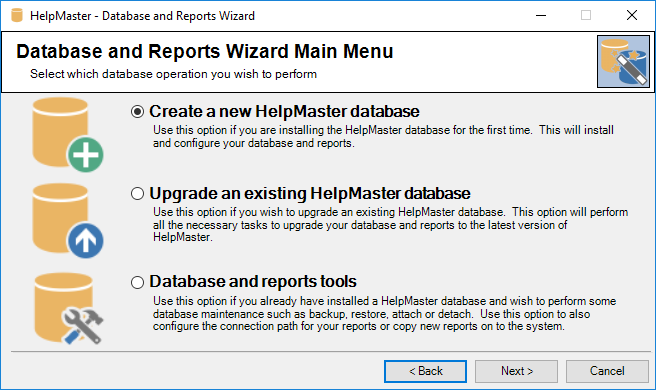
- Select Create a new HelpMaster database and click Next >
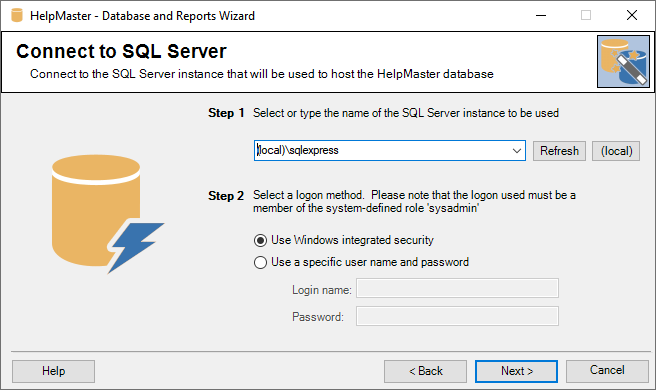
- Select or enter the instance of SQL Server where your HelpMaster database is located and choose a logon method. Click Next > to proceed.
Naming a database tip
It is recommended that you do not use product numbers in the naming of your HelpMaster database. This may lead to confusion when the product is upgraded, but you leave the database named as it is.- On this screen choose which type of database you wish to create, with or without sample data. Choose the appropriate option and a name. A default name is provided, however you may instead type a name of your own choice.
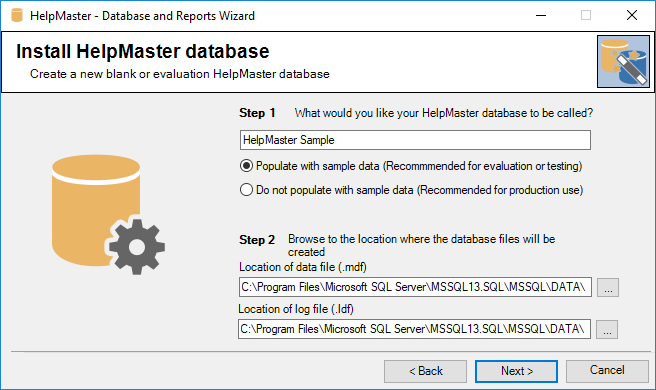
In Step 2 the default data file location for your SQL Server is displayed in the text boxes. You can leave this, or browse to your own location. Note that the location you choose must be a location that your SQL Server can “see” and has access to. Click Next > to proceed
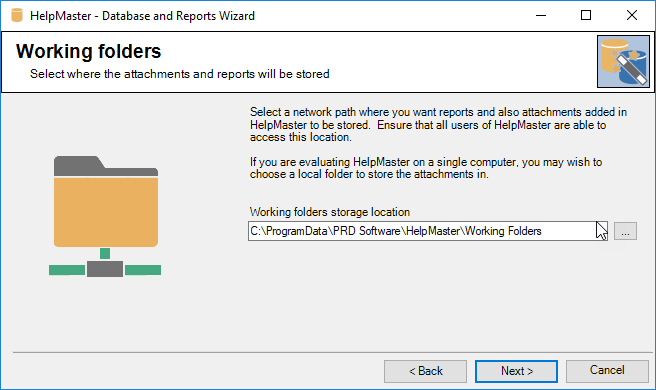
- The Working Folder location is a network folder used to store all of the files that HelpMaster will need to operate. This includes the report files, attachments, emails and other files that are created, or used by HelpMaster. Select a network folder that all HelpMaster users will have access to. Click Next > to proceed
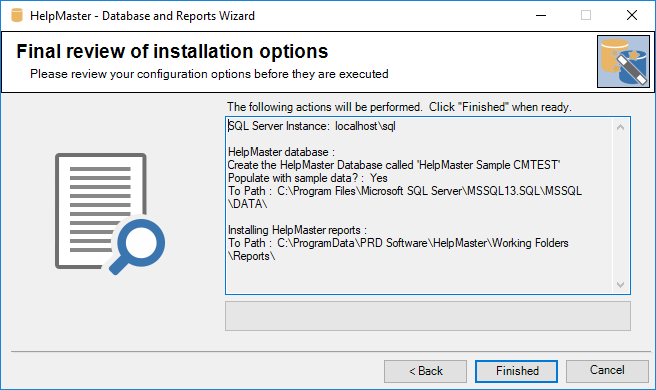
- This next screen presents a summary of the choices you have made throughout the wizard. You may go < Back to amend any options or click Finished to create the new database.
- Upon successful completion of the wizard, you will see the following screen. If any errors occur during database creation, you will be notified about the nature of the error and an error report will be saved.
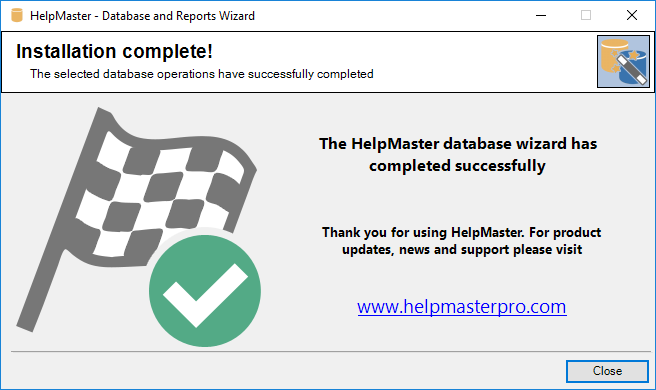
- You should now have a HelpMaster database and folder structures ready to use. Click Close to exit the wizard.
Feedback
Was this page helpful?
Glad to hear it! Please tell us how we can improve.
Sorry to hear that. Please tell us how we can improve.